|
Should I stand or sit?
I can't stand turning!
Let’s sit down and think about this.
Videos
Return to Physical Limitations Main
|
| |
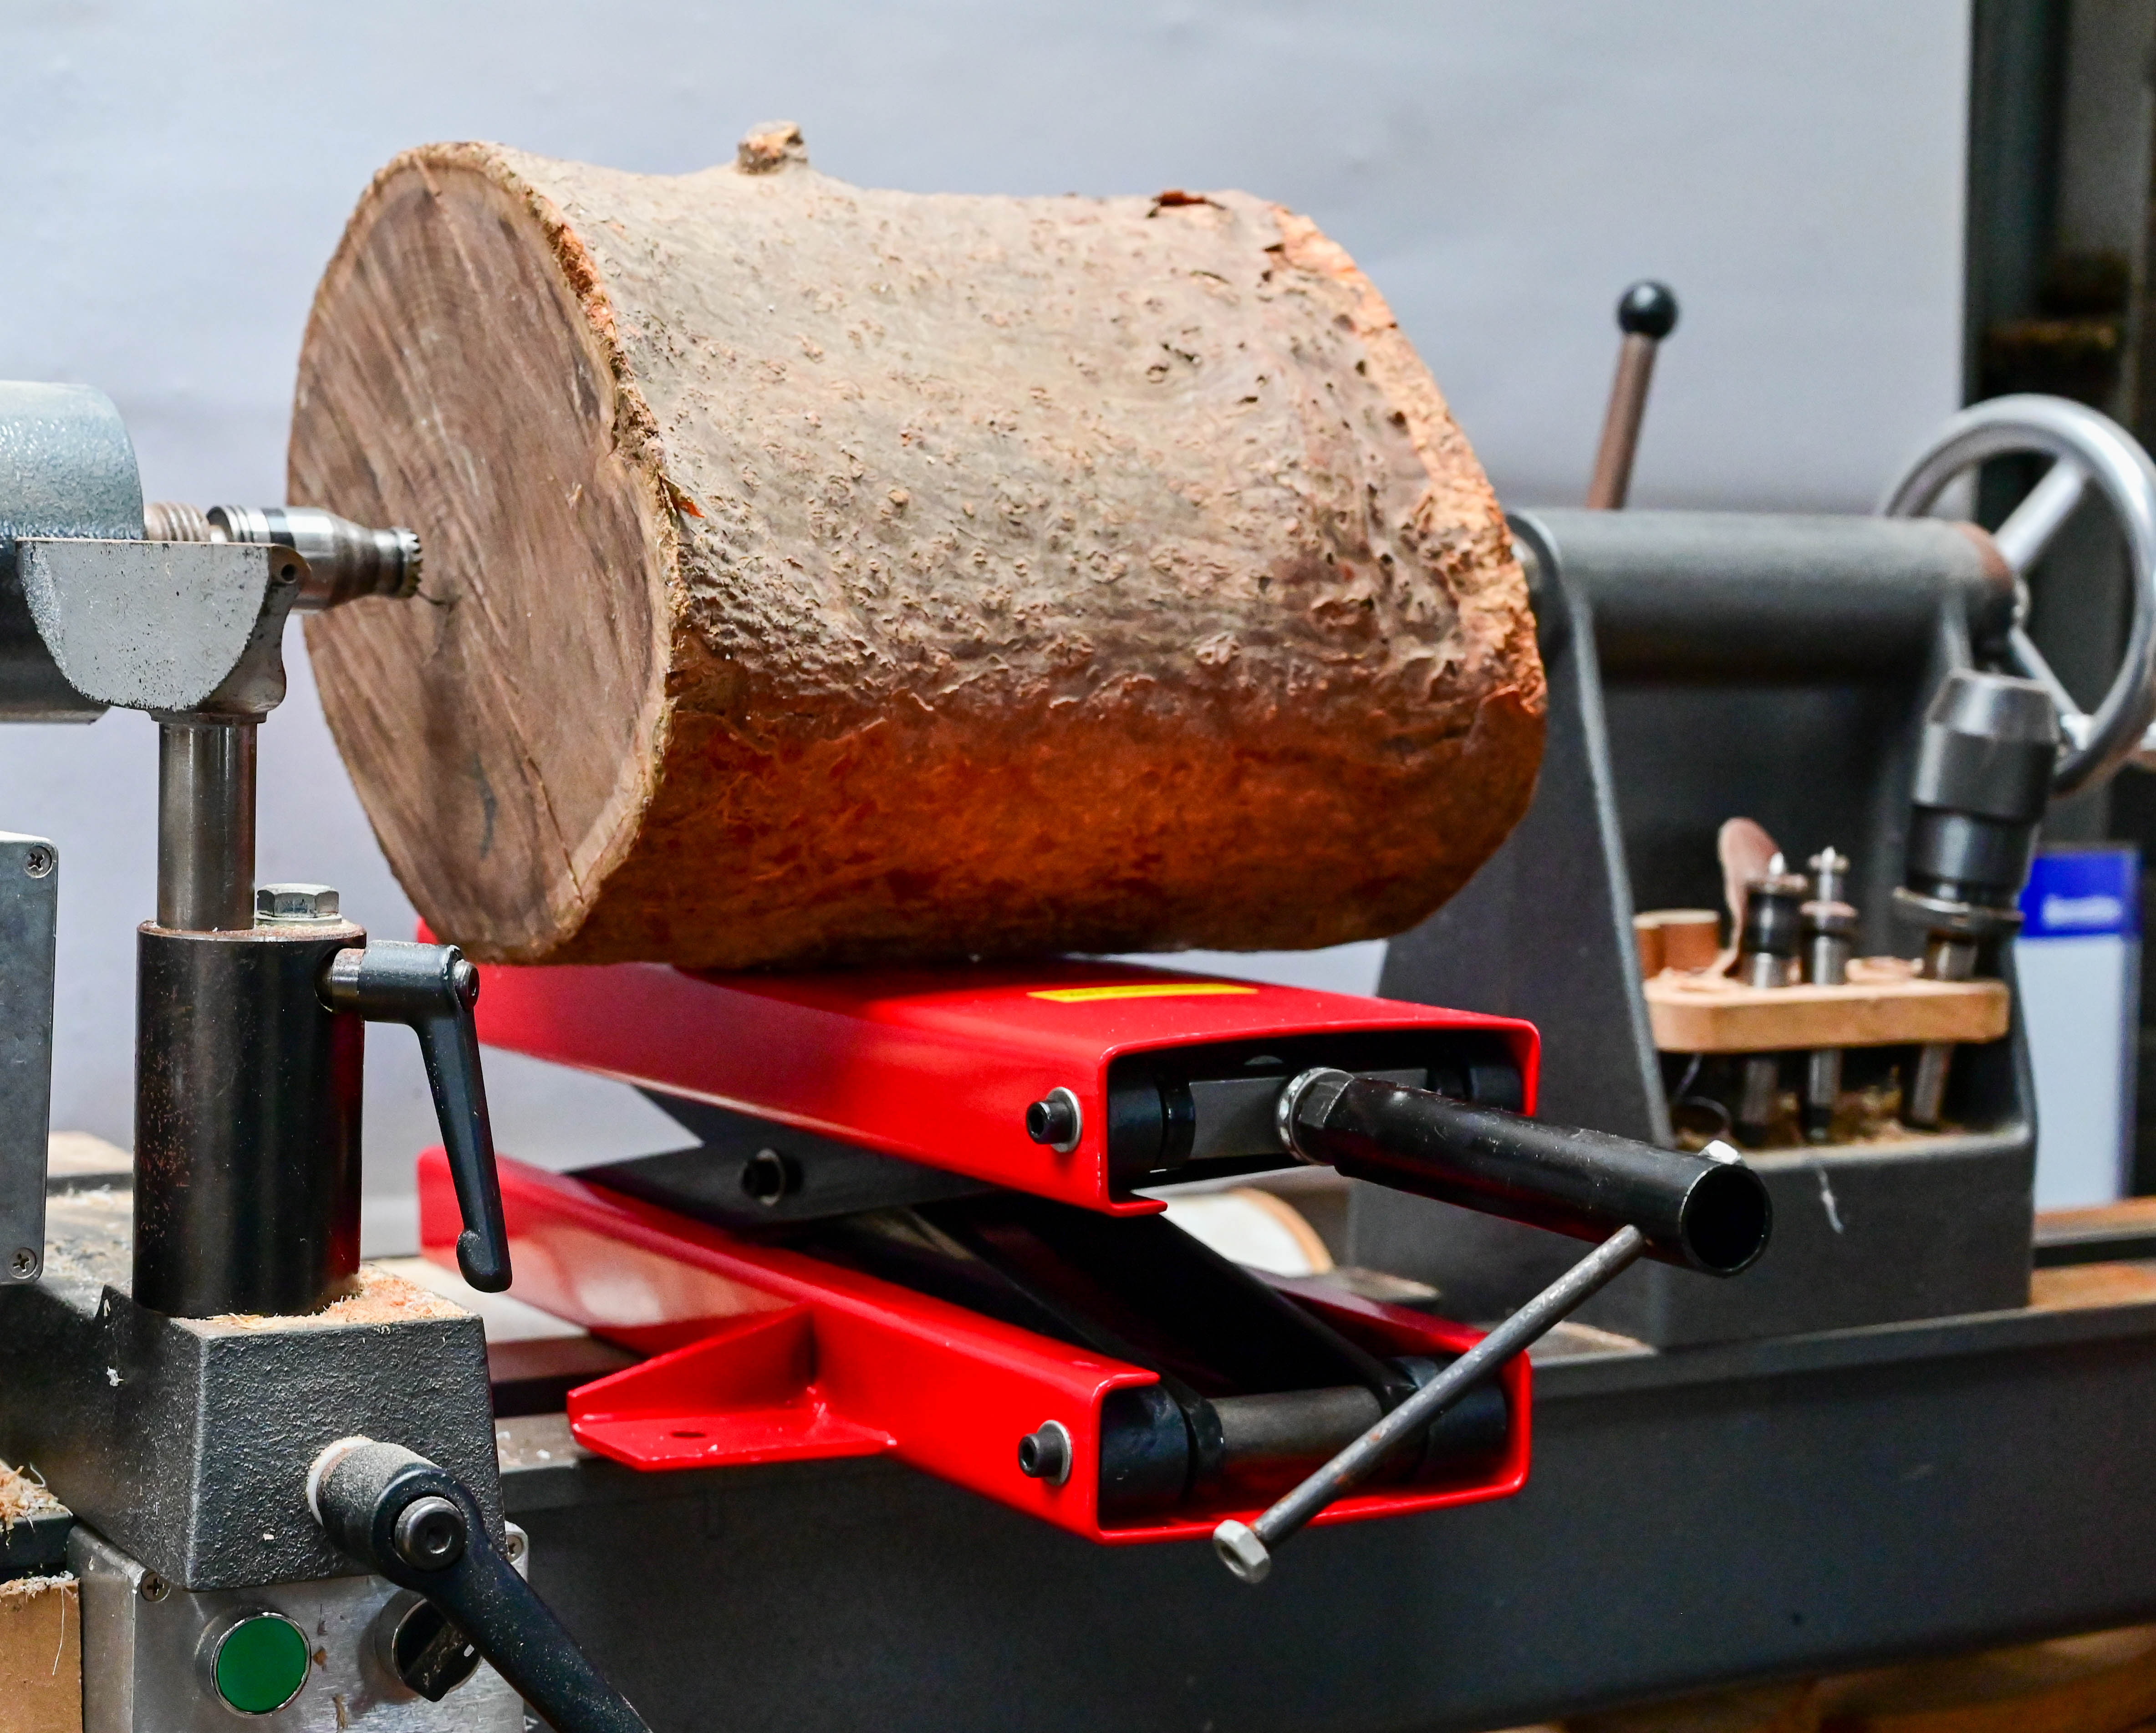 |
| Photo 1: Even if you can lift a log, positioning it accurately can be a challenge. A motorcycle jack takes the strain and is easy to adjust. |
| |
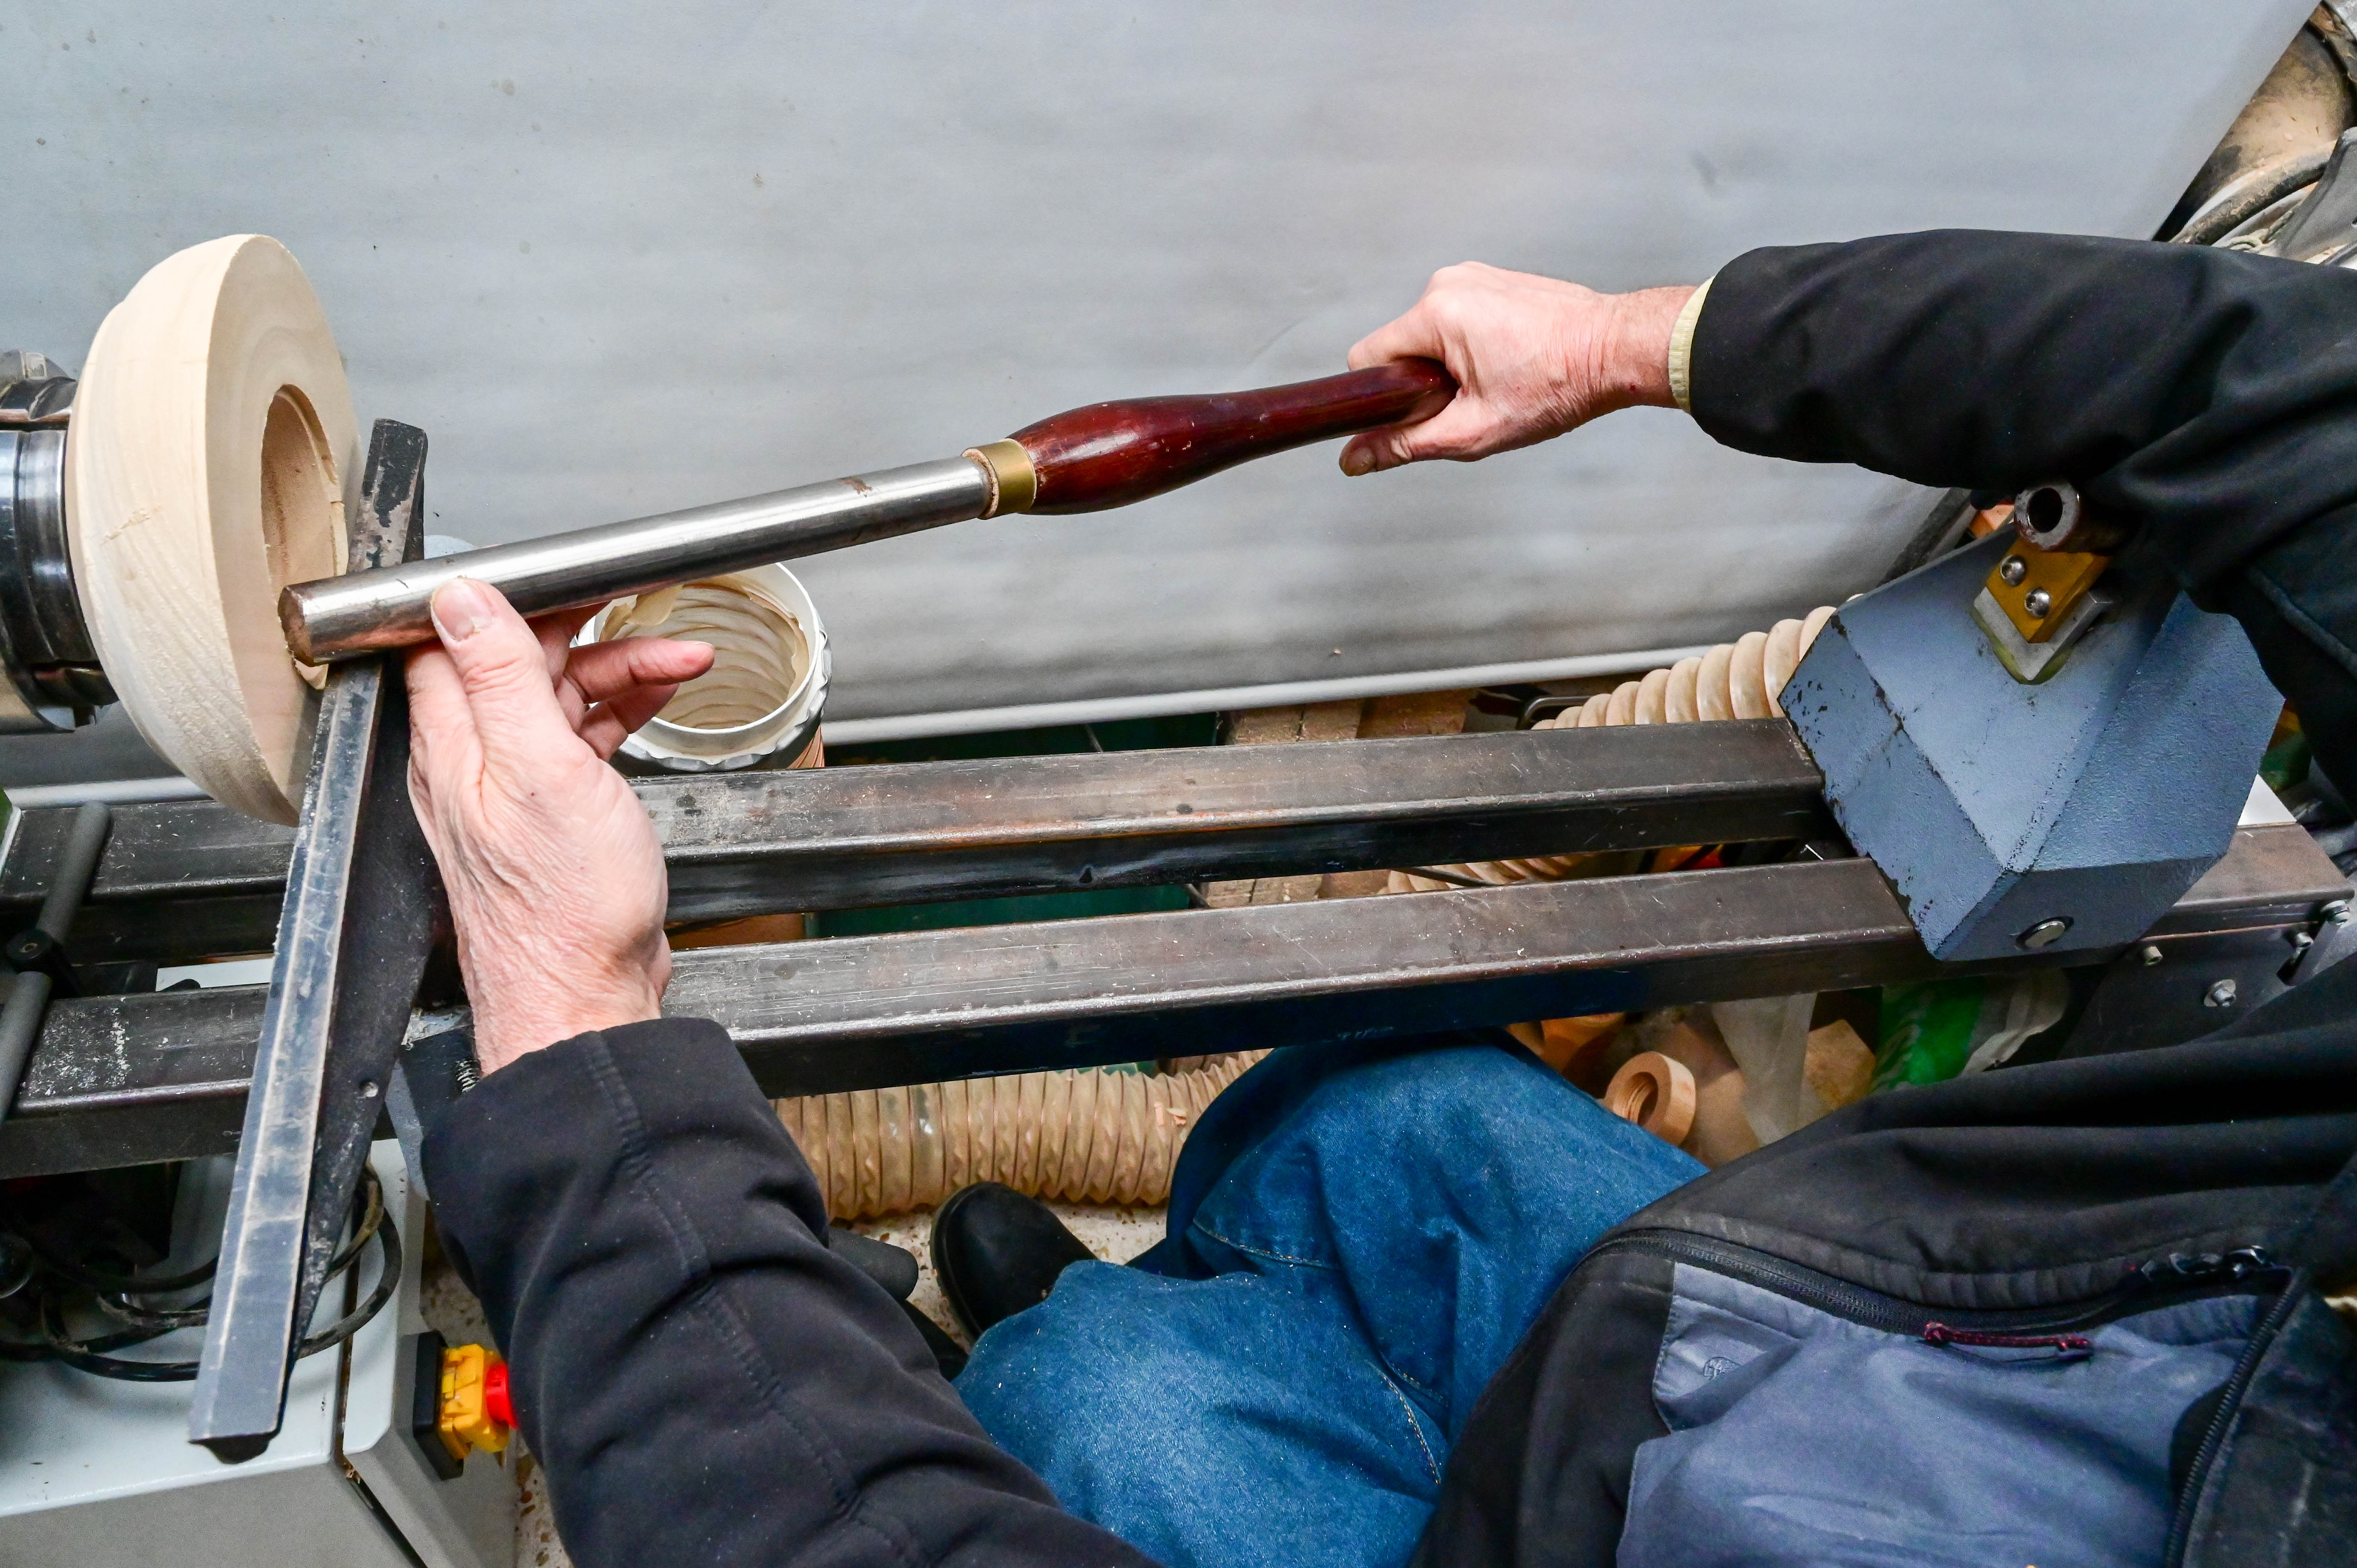 |
| Photo 2: Tool support is vital. Here we have contact points at the cutting tip,
bevel, toolrest, hand, other hand, and elbow on the tailstock for
maximum control (unusually large bowl gouge used for clarity). |
| |
|
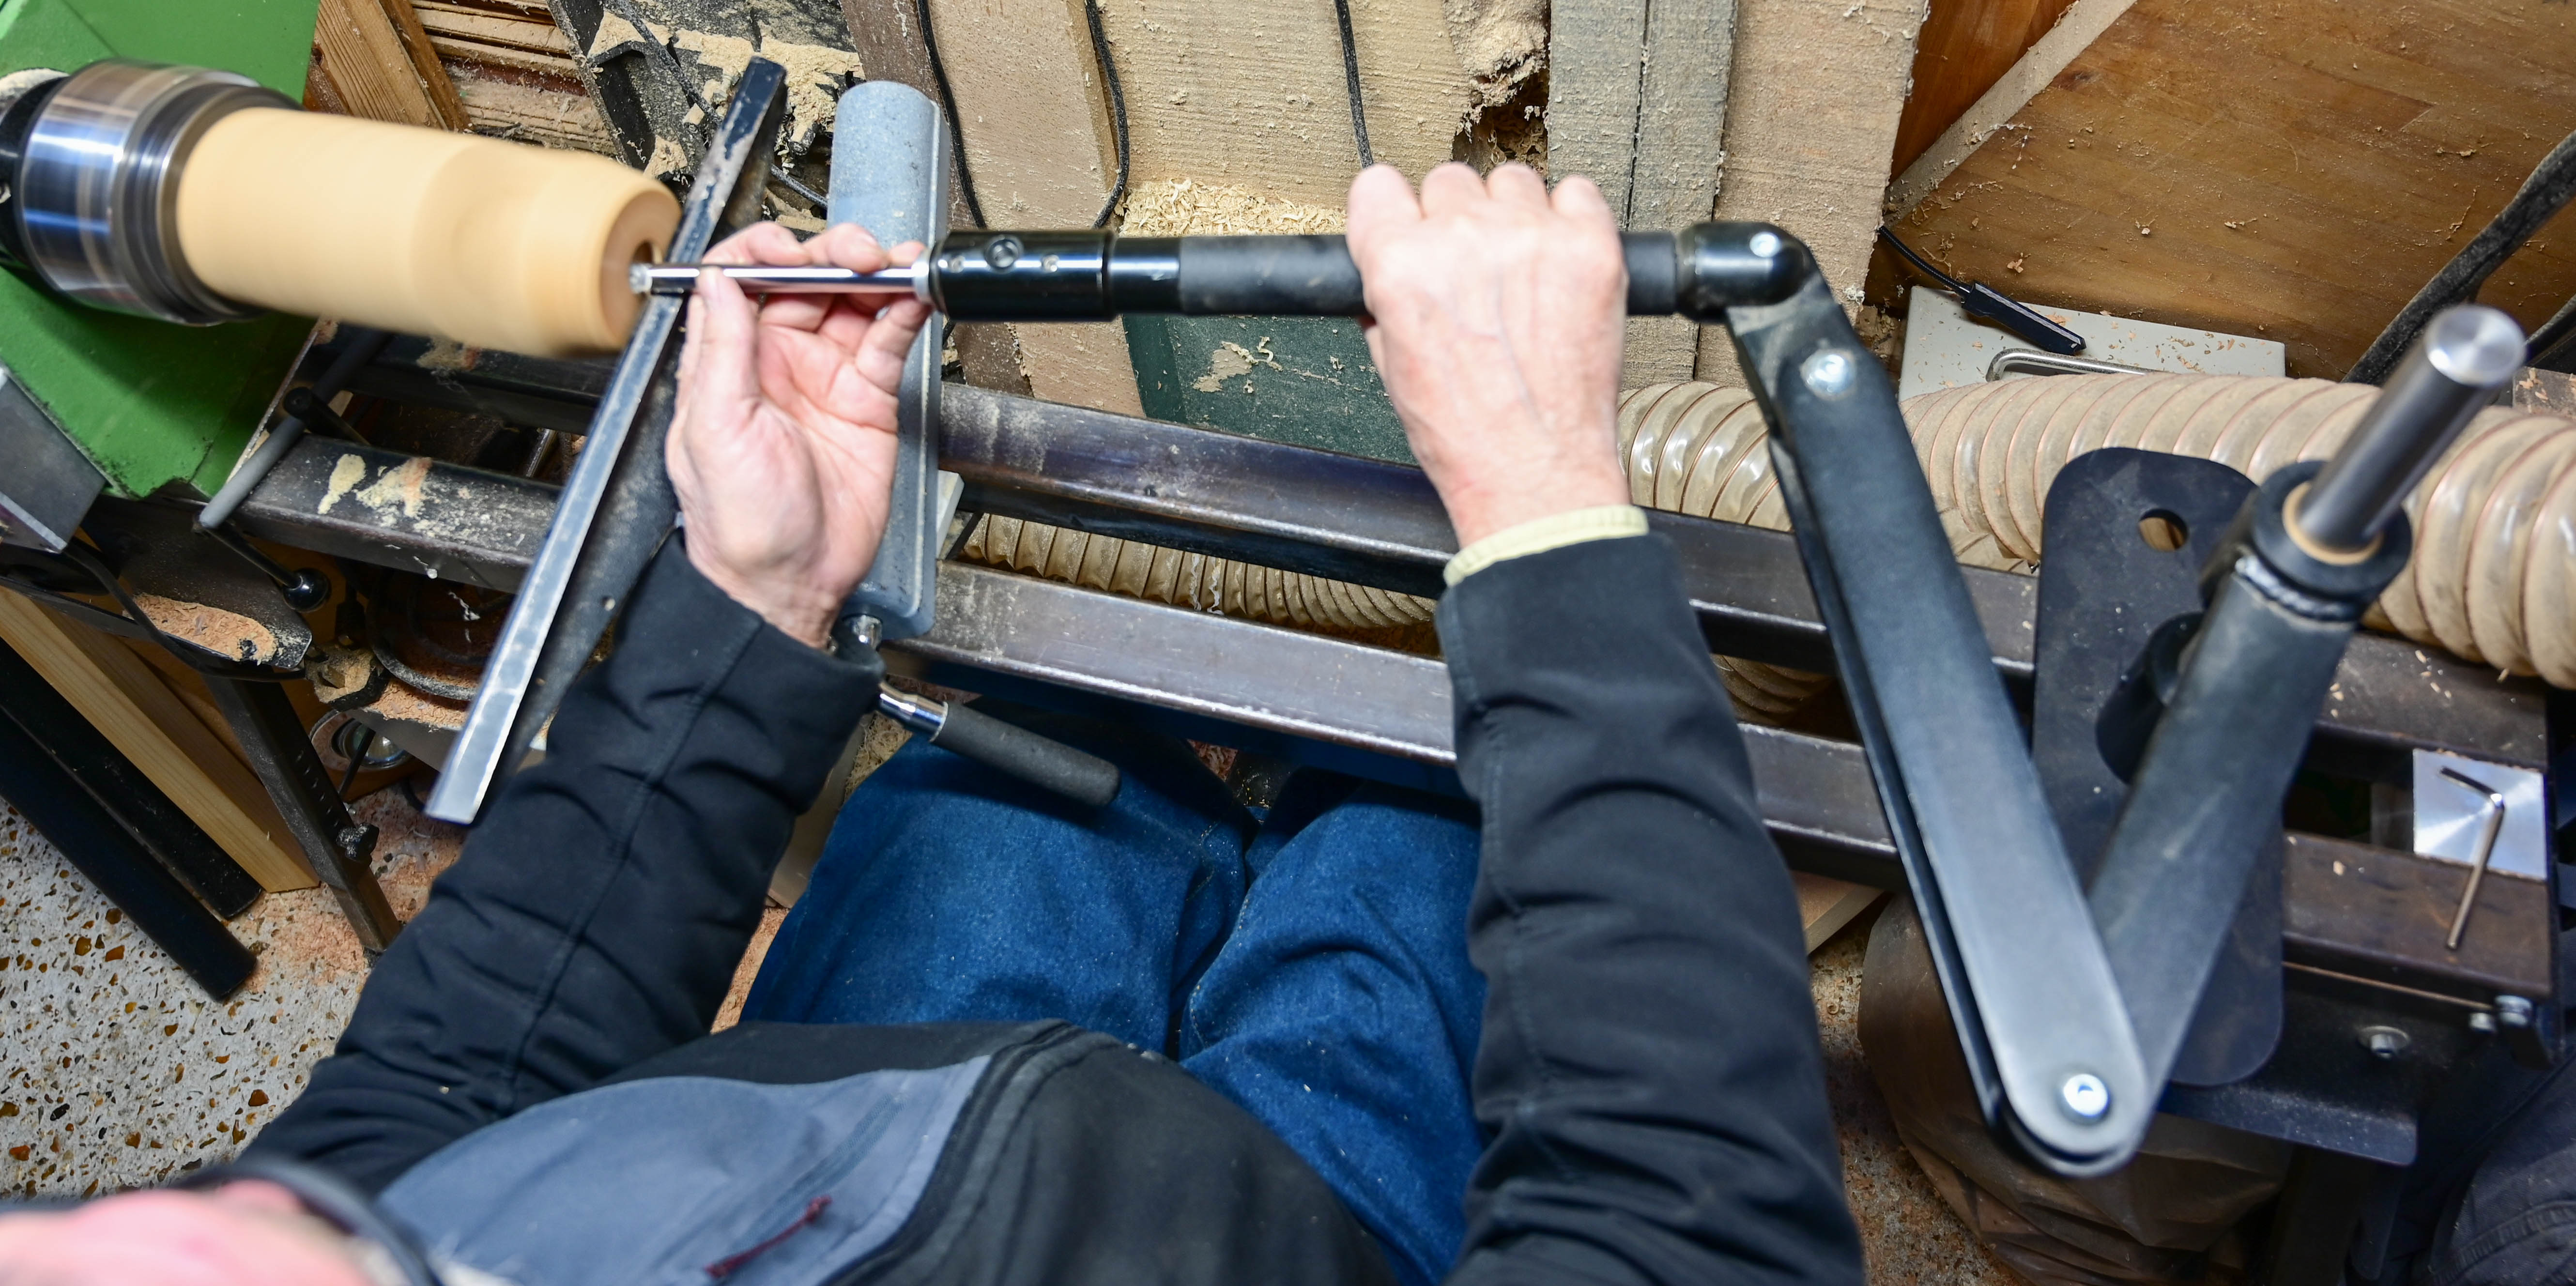
| Photo 3: Hollowing rigs used in conjunction with carbide tools take much of the strain out of almost all hollowing operations. |
| |
 |
|
Photo 4A: A blank with a large hole bored through the side enables you to see and understand what you are doing when starting out.
|
| |
 |
| Photo 4B: Turning the bottom of a hollow form can be tricky. This rig enables a
perfect view so you can understand the process safely before attempting
the real thing. |
| |
|
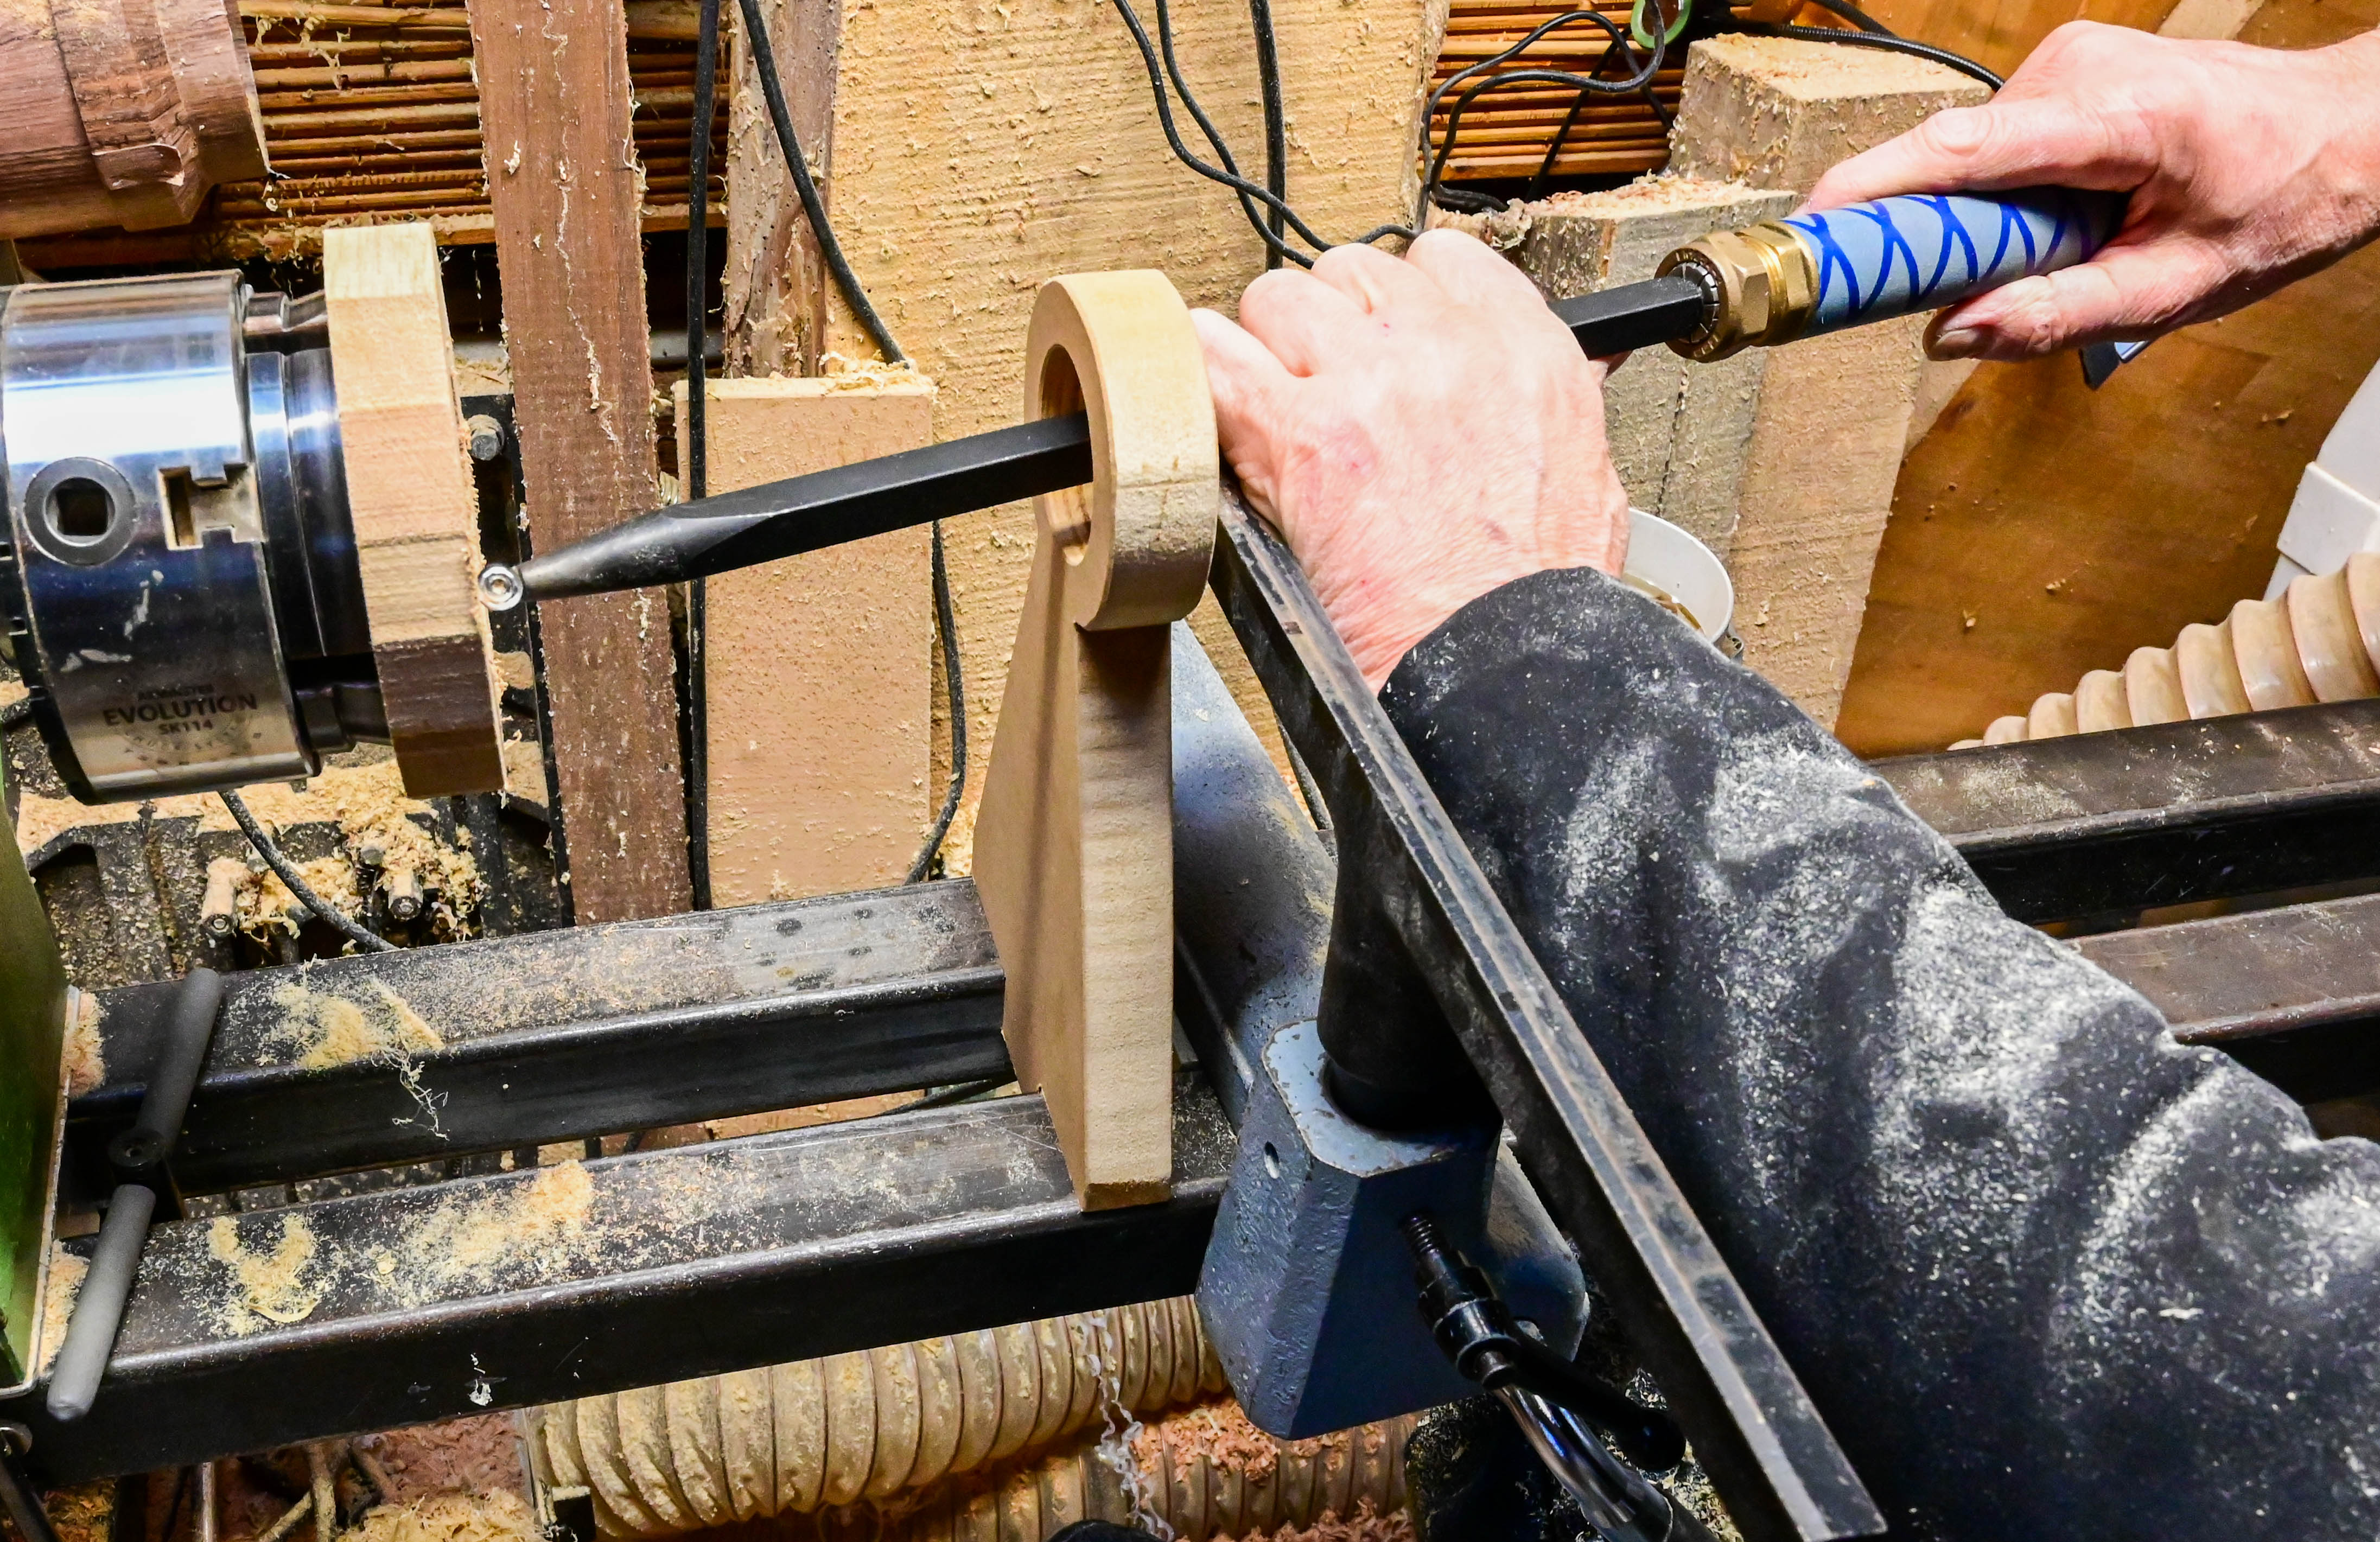
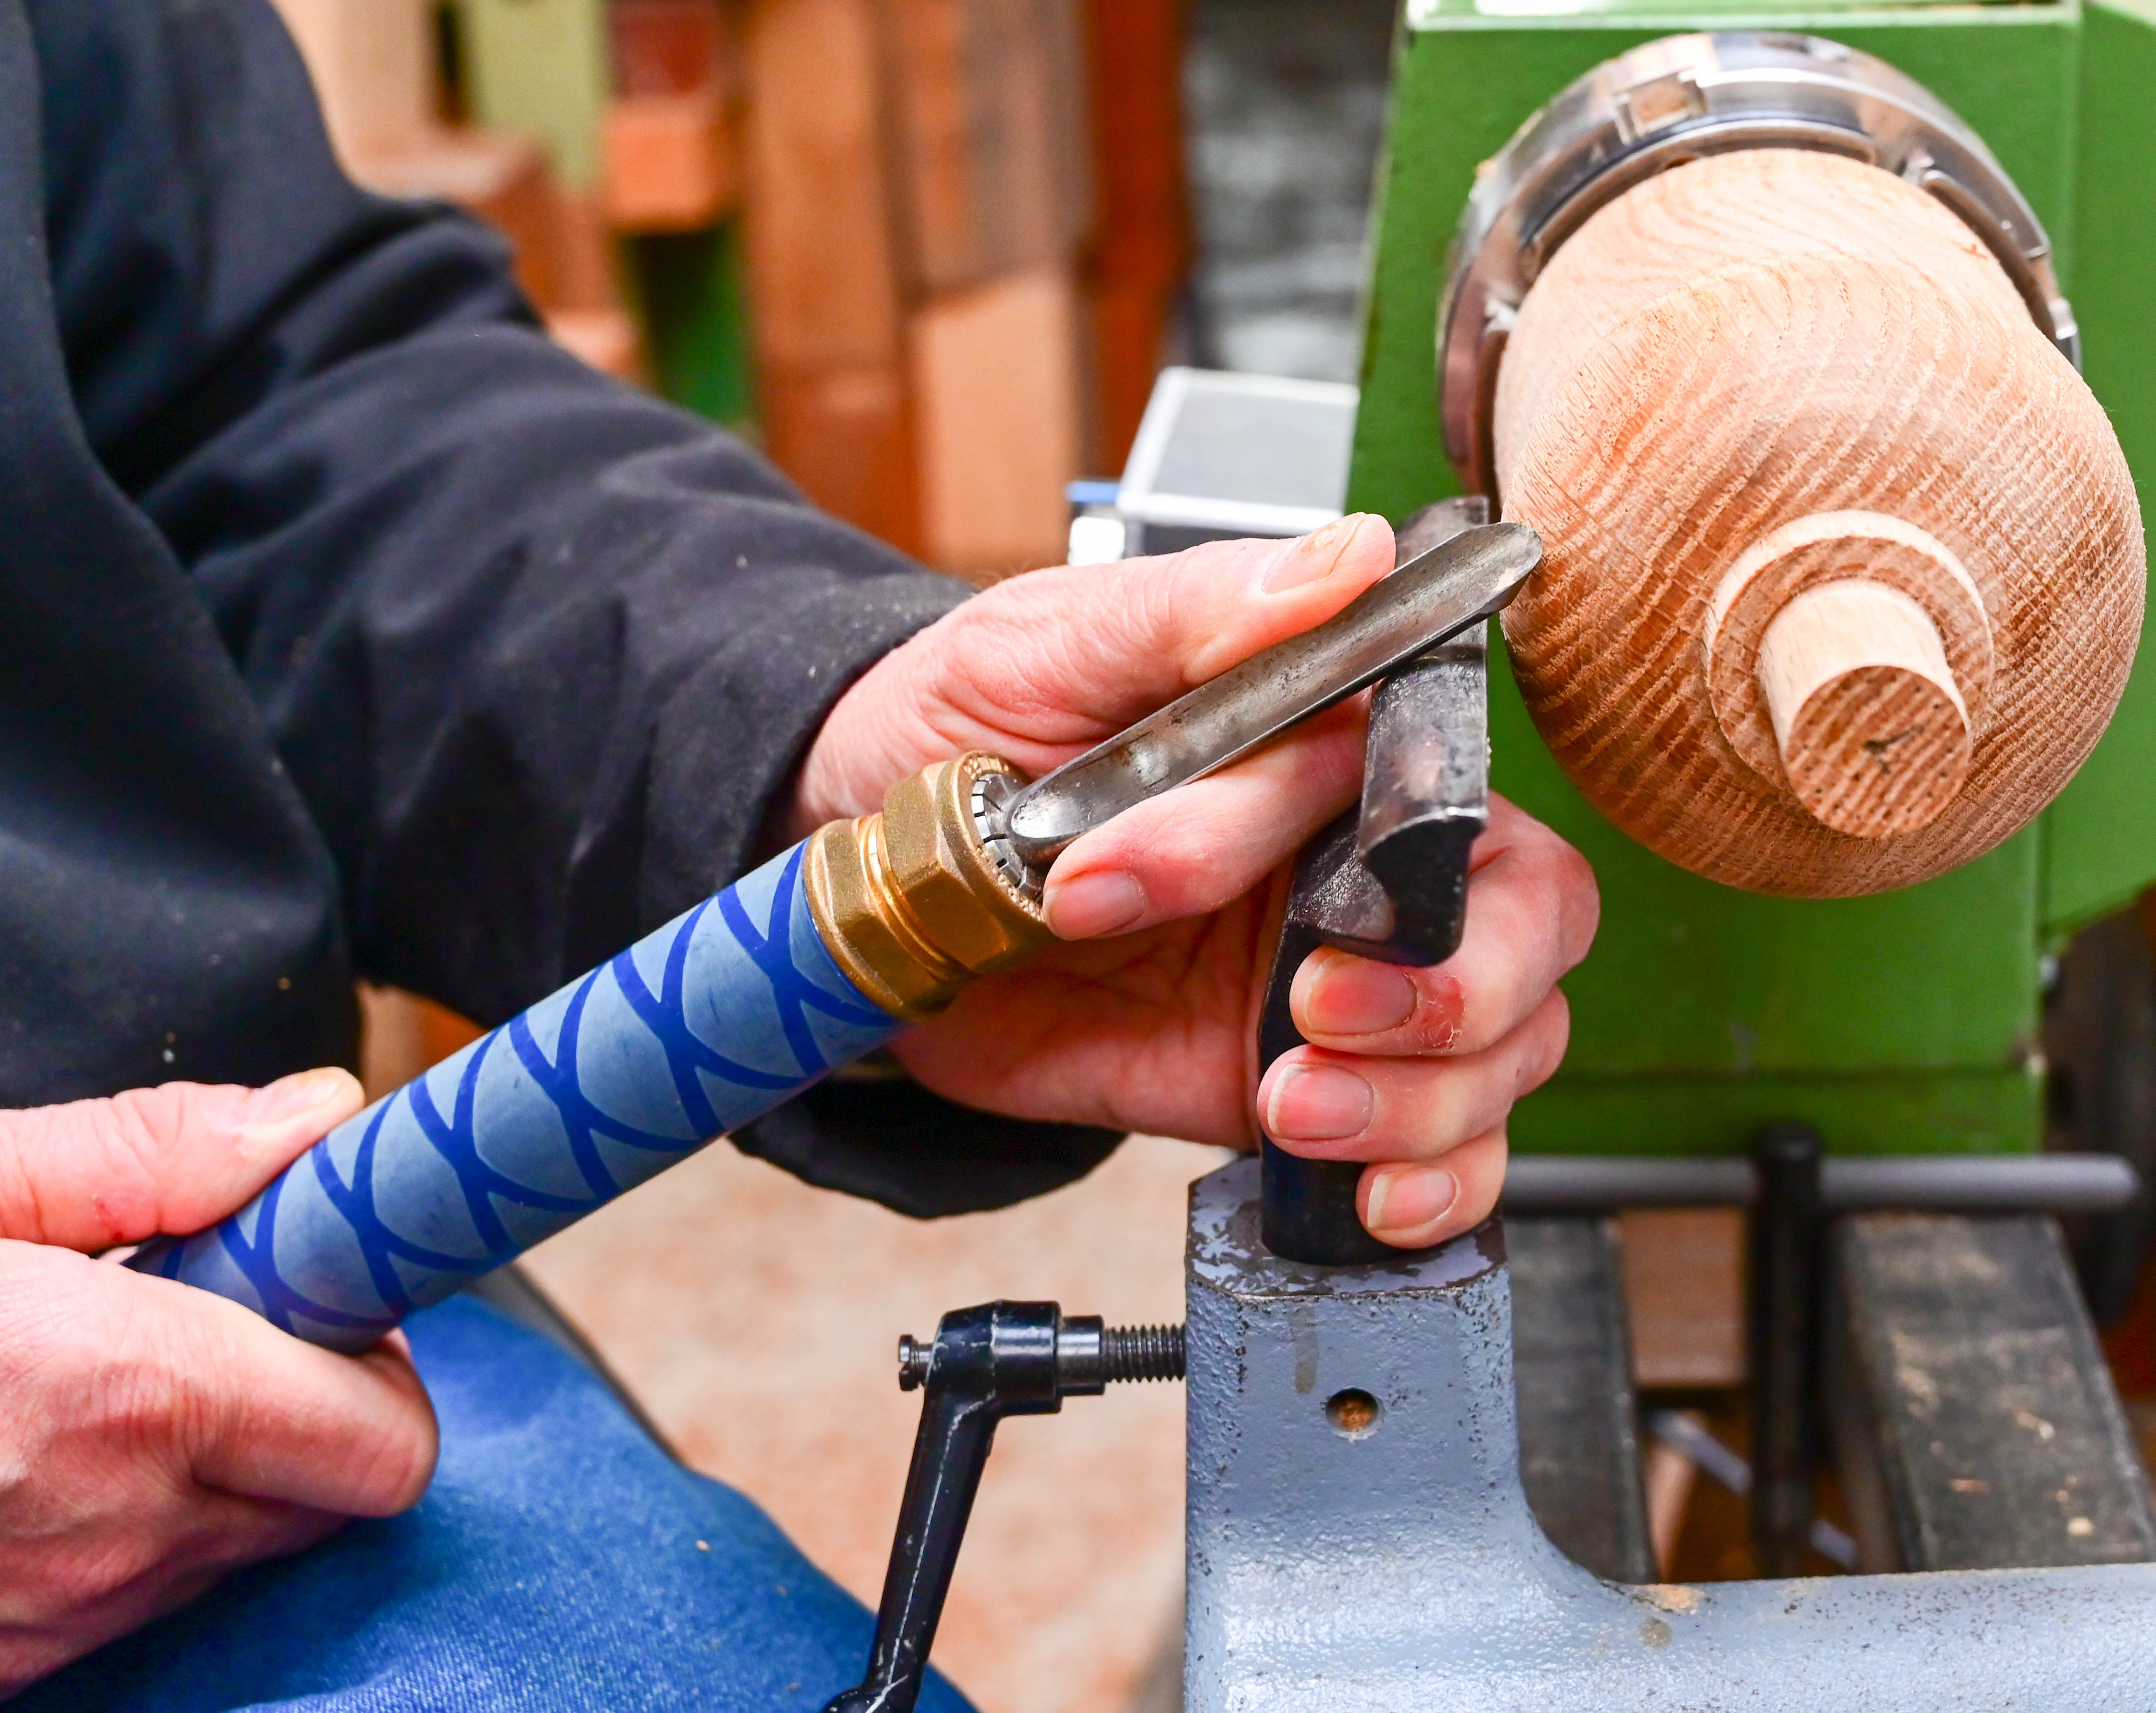
| Photo 5: The toolpost grip provides addition control, locating your hand and allowing your other fingers to manipulate the tool. |
| |
 |
|
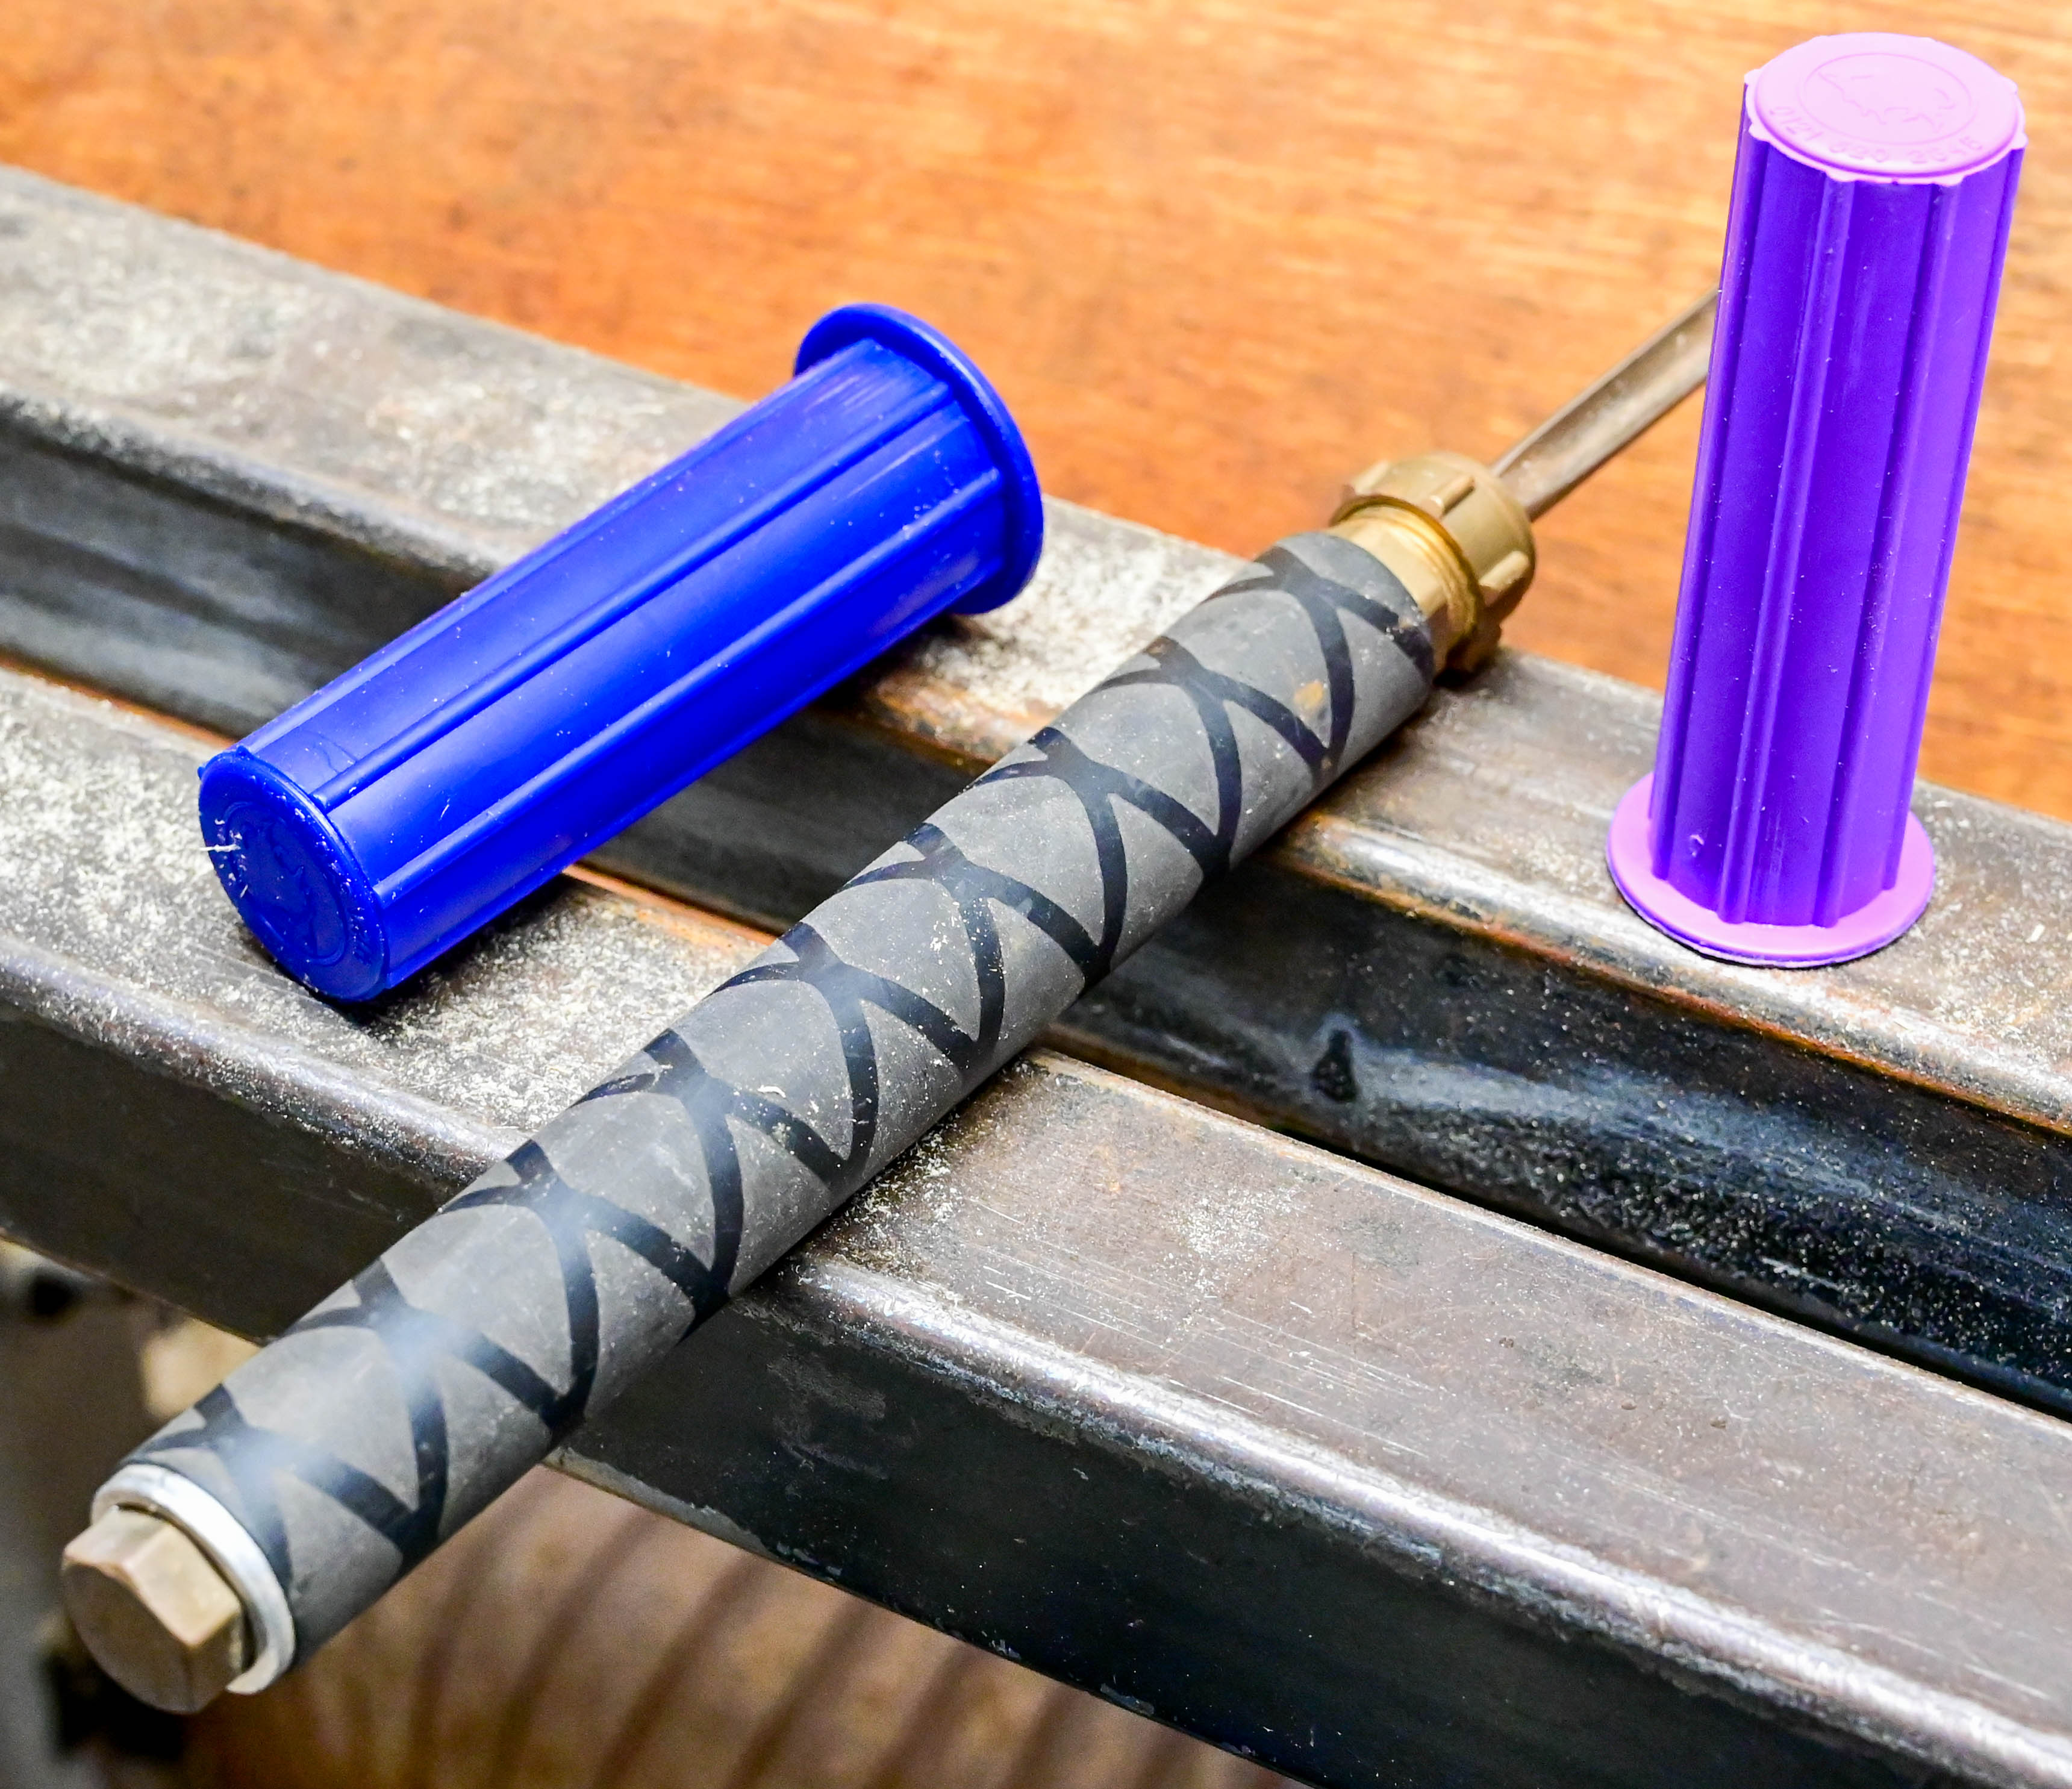
Photo 6A: If you are not comfortable using standard tools, consider a grip better suited to your hands.
|
| |
 |
|
Photo 6B: Tool grips are available for gardening tools and other tools which can be readily adapted.
|
| |
 |
|
Photo 7: For even better control, a side handle can be added to some handle systems, or in this case, to any tool.
|
I can’t get to grips with these tools.
Many things affect our ability to stand at a lathe for longer periods, from accident or injury through to arthritis, stroke, or joints simply wearing out. These and other issues can also lead to difficulties including grip, control, or movement that affect our ability to manipulate tools in the way we need for turning.
Upper limb difficulties need not prevent us from turning. We just need to work out a way to enable us to control our tools to achieve the results we want. The main objective is to get as comfortable as possible, ensuring that we don’t overextend our reach. Then use the tool or technique that requires the least effort to control.
For some, just mounting a blank can be a challenge, though this is relatively easily solved with some form of lifting device like a motorcycle or lab jack which makes alignment so much easier.
See Photo 1.
Minimizing the effort required.
Traditional tools work perfectly well when they are sharp and ground appropriately for the task at hand. It also helps to maintain bevel contact, and ensure the tool is well supported while maintaining a comfortable stance. Assuming you’ve taken care of the first two, sharpness and grind geometry, my focus is therefore to make the tool work efficiently by keeping the toolrest as close to the blank as possible throughout turning. Moving the toolrest regularly helps. This also provides an opportunity to take a short break from repetitive cuts allowing your muscles a chance to rest and recover. However, for bowls and hollow forms, a traditional straight rest might not enable you to stay close enough. I therefore have both curved rests and extended rests enabling me to better match the shape of my blank or to extend inside it as far as is practical.
Leverage is your friend. Support the tool close to the work and hold the end of the handle for maximum control.
See Photo 2.
Tool Control
After tool and rest selection, the most important element is good technique. This ensures that you have multiple support points to help you control the tool during the cut when you need to resist the forces exerted by the wood pushing against you.
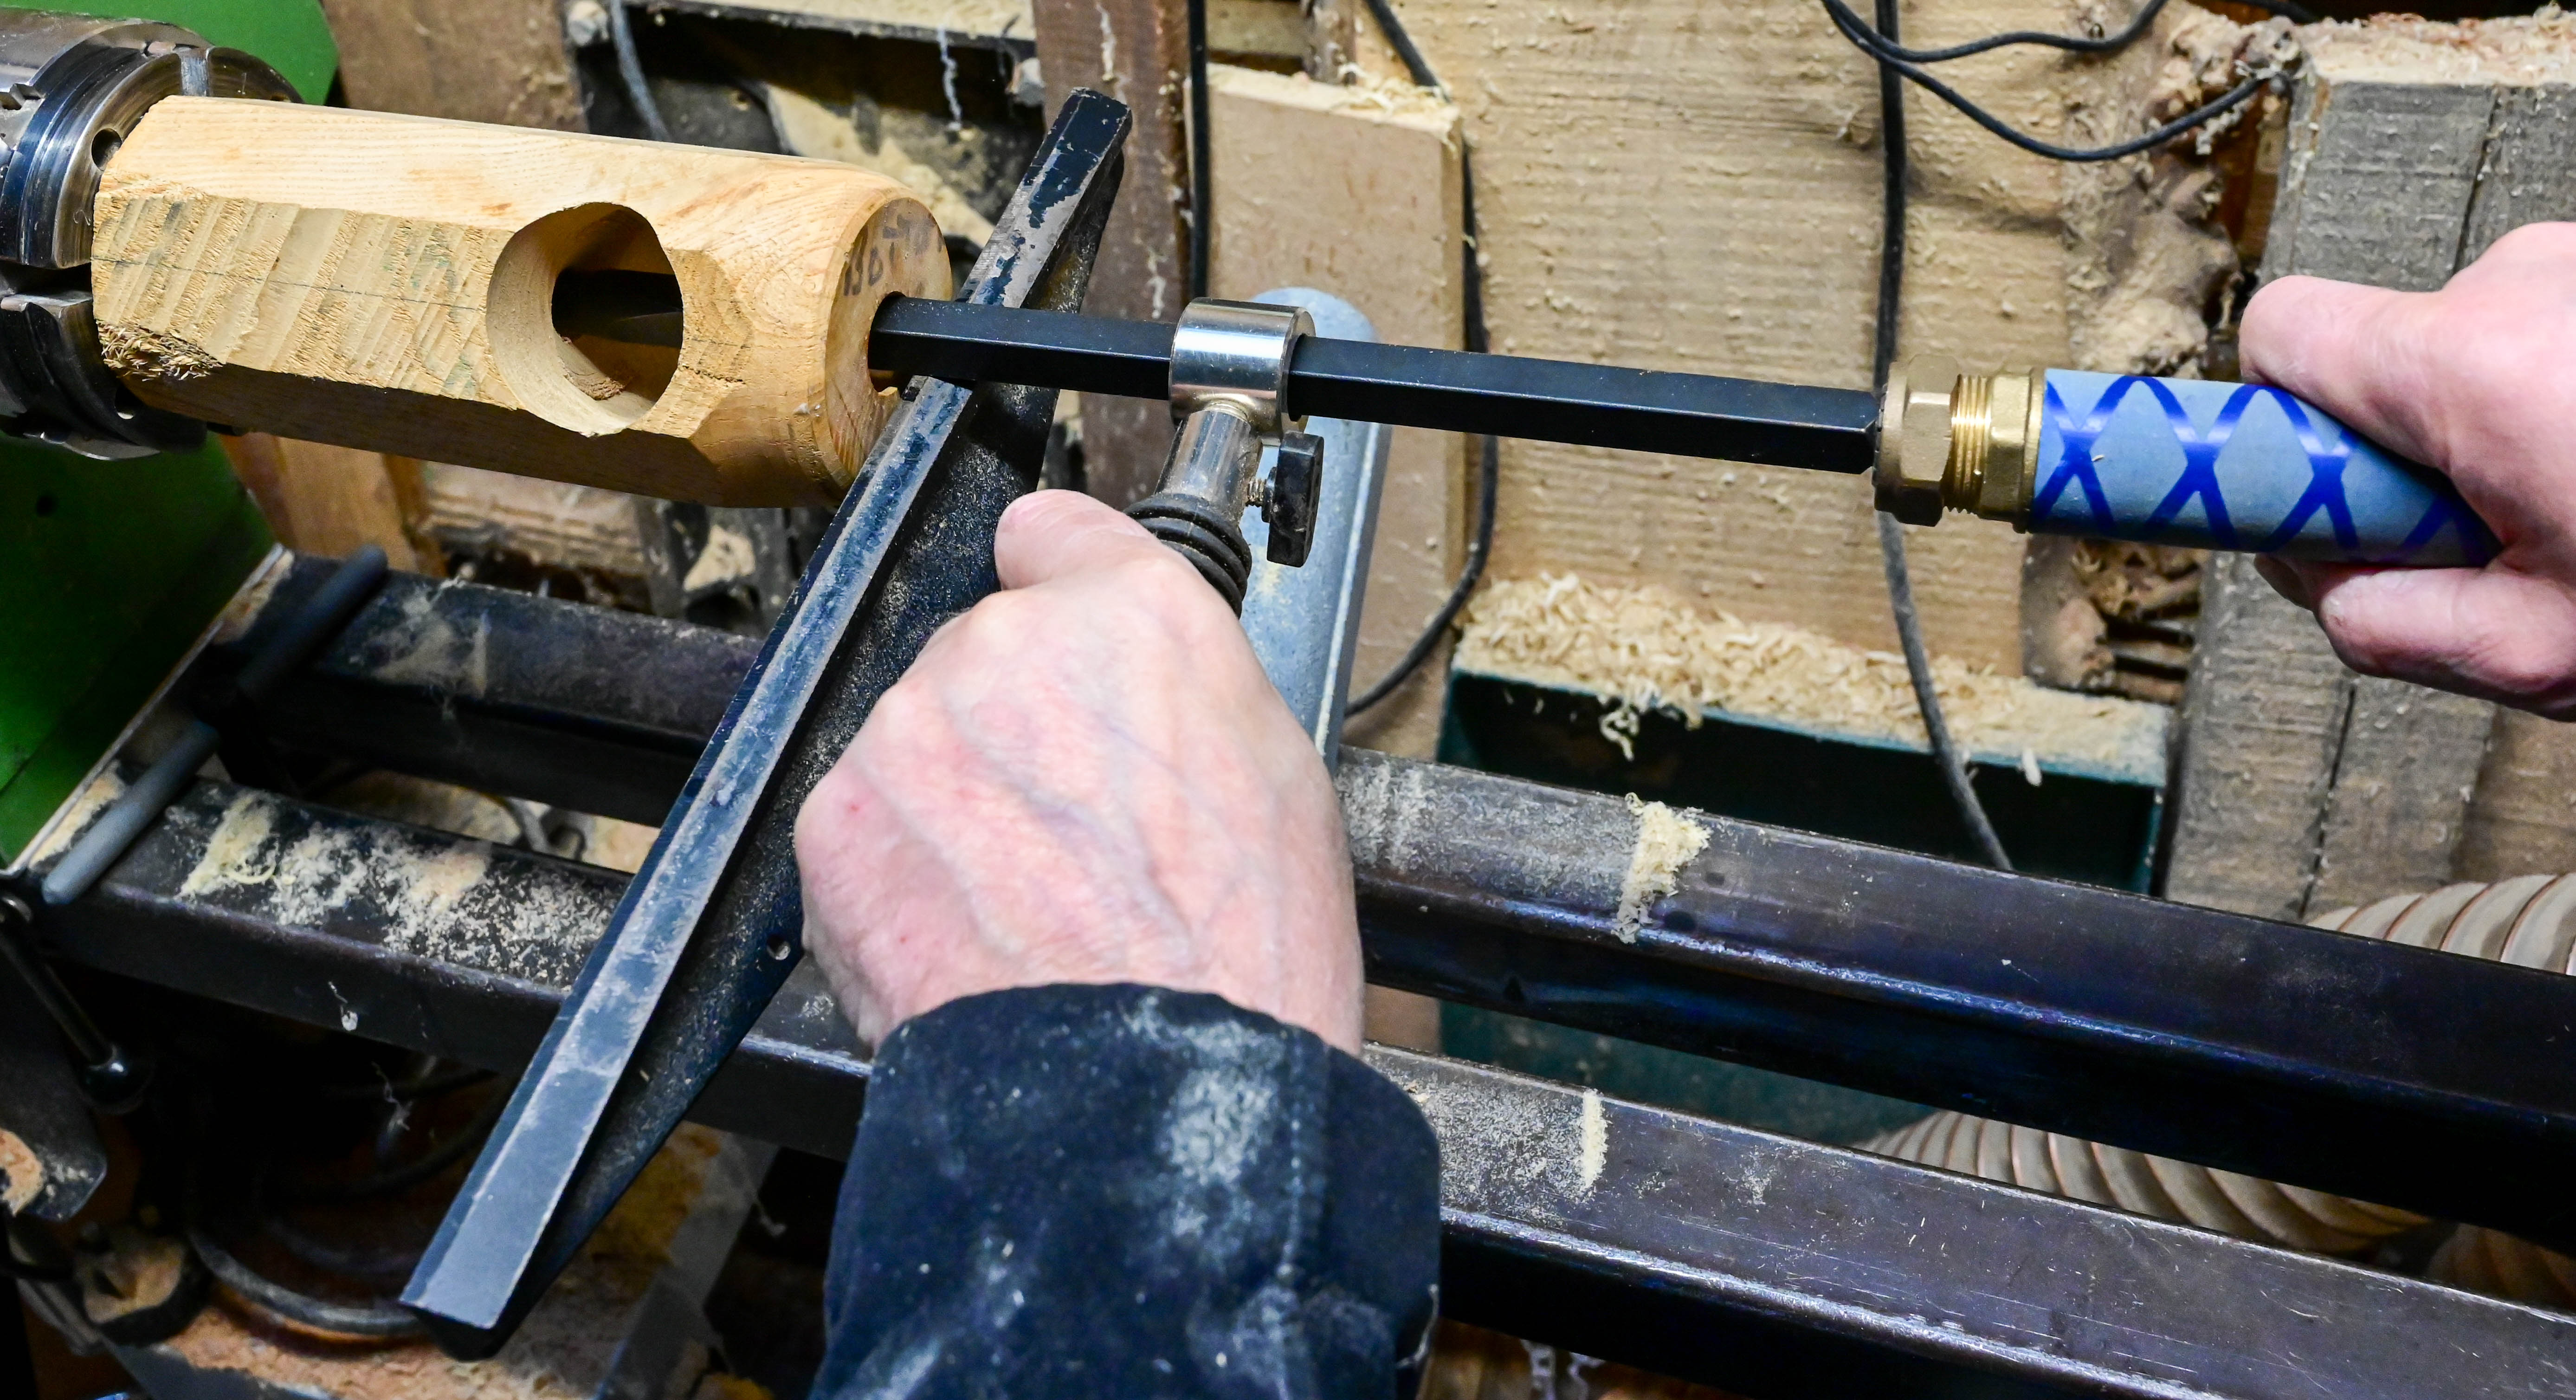
Captive hollowing rigs can help enormously as they provide much of the support, leaving just the choice of cutting tip and control to you, once set up appropriately for the task at hand. Don’t just think of these as being for deep hollow forms work just as well on smaller items including bowls and boxes. They can be used on the outside of some items, or even on spindle work if appropriately set up.
See Photo 3.
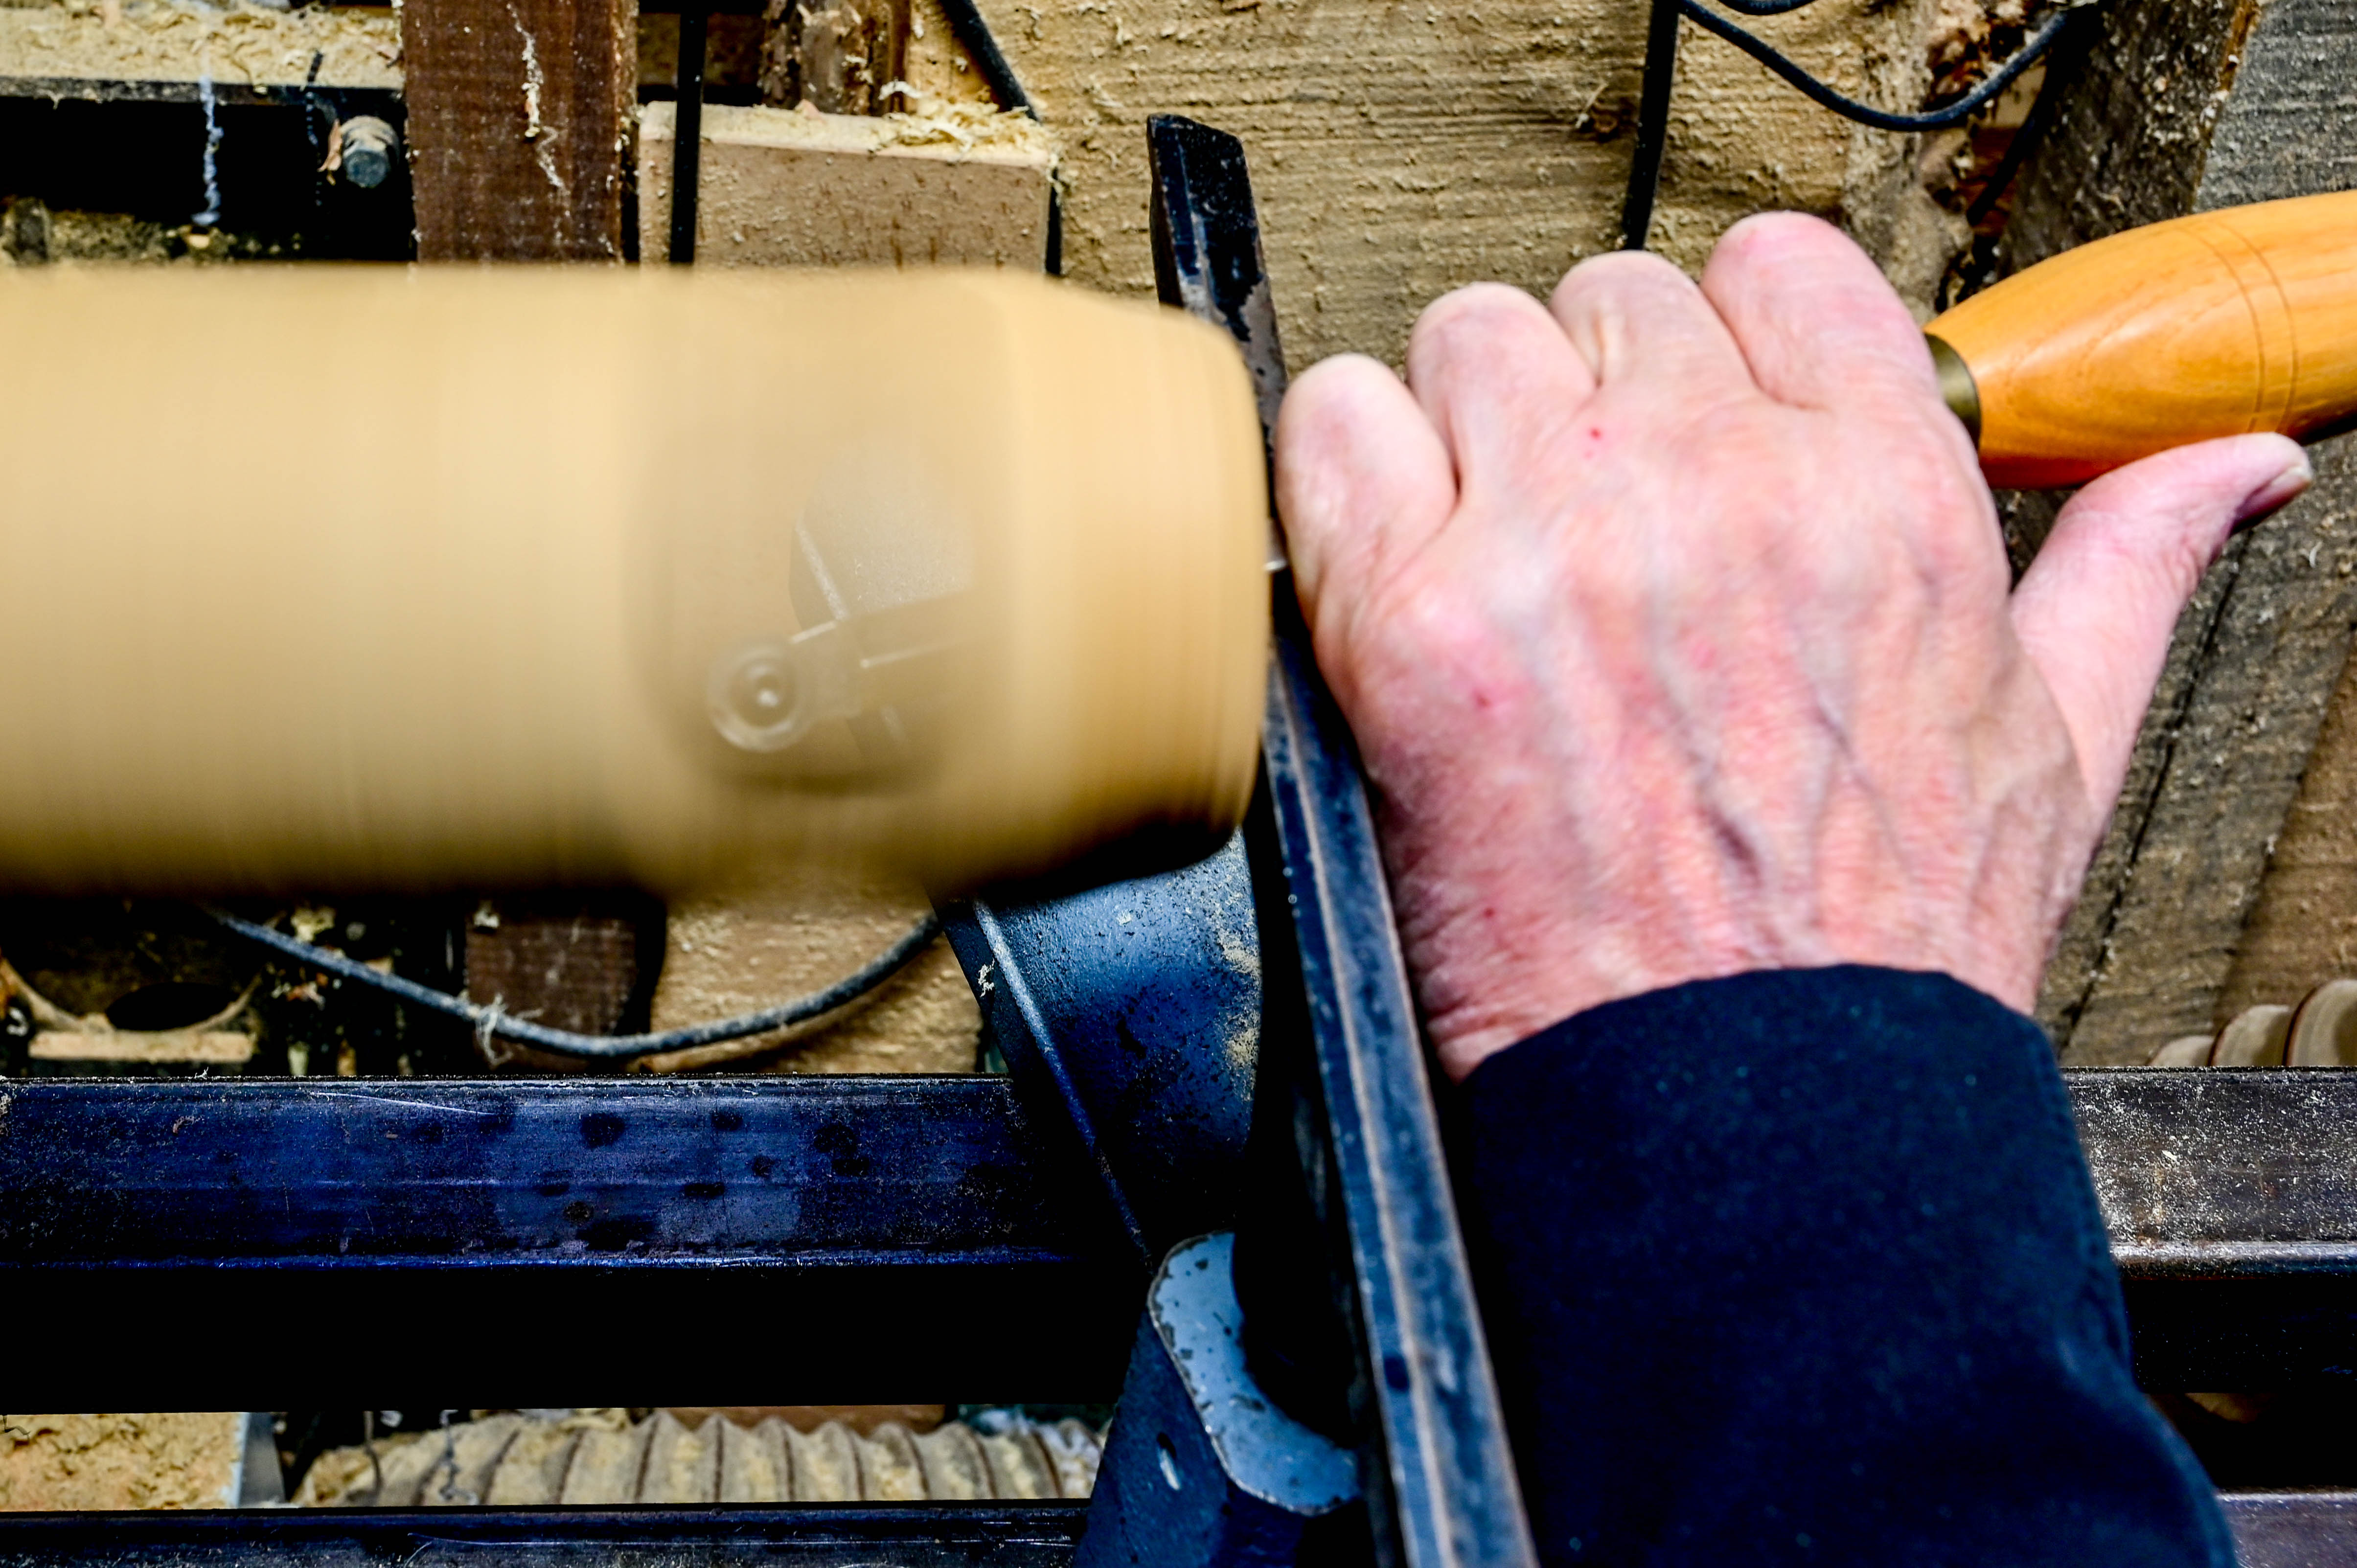
Carbide tools offer another option, especially when making cuts in the bottom of a deep bowl. I always favor a nice slicing cut when possible, but using a traditional bowl gouge in the bottom of a deep bowl may not yield the desirable result. The cupped carbide cutters effectively resolve this issue, providing a small area with sufficient rake to slice the wood. These are very effective for hollowing deeper bowls, though they do have their quirks, and you have to learn how to best present them to the wood.
Workshop Tip: Irrespective of which tools you choose to use, most can benefit from being presented at a skewed angle to the wood. Although a little harder to control, this results in more of a slicing action which cuts the wood with less force and more cleanly.
I find that cupped carbide cutters work best when the tool shaft can be rotated in use, adapting the cut as you transition from the bottom, up a vessel’s sides and at the undercut. However, you may choose a compromise angle when the tool is fixed in a hollowing rig, or adjust the tool to cut different areas of the turning. Smaller cutters also help as they present a narrower cutting edge to the wood further reducing the force exerted by the wood pushing down on the cutter.
Cupped carbide tools are a good supplement to your tool kit.
Workshop Tip: If using a skewed tool results in a slightly less smooth curve because it’s less well supported and requires better control, you can take a very light finishing cut with a wider scraper to smooth any ridges or blend curves.
If you can’t get on with cupped hollowing tools, you could try the flat topped carbide cutters which are also very effective when kept sharp.
I can’t see for looking.
When developing your technique with new tools one of the problems is that it’s often difficult to see what’s happening in a hollow form. I use hollowing simulators to enable a clearer view of what’s going on when teaching and demonstrating.
See Photo 4A and 4B.
I use my hollow form simulator to replicate the conditions at the bottom of a hollow form. It comprises a relatively shallow bowl blank and an artificial hollowing orifice further away magnetically attached to the lathe bed. As there are no sides in the way, you can see exactly what’s going on. Seeing the undercut is a bit trickier, but drilling a small hole near the top of the blank provides a good view of the hollowing process. Once comfortable with your planned technique you can better understand what is going on in a real hollow form.
Workshop Tip: Mark the top of your tool shaft or handle on hollowing tools so that you know where the cutting edge is pointing.
Get a Grip - Keep that tool under control.
Where you need more control over tools, the first thing I focus on is getting a good firm grip on the tool to enable me to direct it as I desire. I like as much support for my toolrest hand as possible so that I can resist forces on the tool and move it in a controlled manner. Sometimes I wrap my fingers round the toolrest stem to achieve this. If you use this technique, test it with the lathe stationary to ensure sufficient clearance from the wood. And always keep your fingers firmly in contact with the toolpost to avoid contact with your blank, including when you slide them in or out.
See Photo 5.
Otherwise, I press my palm onto the toolrest to achieve as much control as practical. My other hand is placed at the end of the tool handle to provide maximum leverage. Here you might want to explore the possibility of an ergonomic grip for more control. I have found few commercially available options for larger diameter handle systems as most appear to be for 7/8” (20mm) or 1” (25mm) handles, so a DIY approach may be called for. If you can contribute to this bank of knowledge for turners with physical challenges, please get in touch via [email protected], alternatively participate in the "Woodturning Health & Safety" section of the AAW Forum to ask questions and discuss ideas. (You will need to set up an account to access and participate in the AAW Forum, click here.)
Customize your tools to best meet your needs.
Alternatively you can mold a handle using hand-moldable plastic or epoxy putty. You already have a custom-made mold on the end of your arm. Just warm up or mix the plastic, wrap it round your tool handle and grip it comfortably while it solidifies. Gluing your hand to the tool might make for a very firm connection, but it’s probably best to protect your hand with a glove or plastic wrap so you can remove it from the tool once the resin has set. Other options include turning your own wood handles to the length and width you desire.
See Photos 6A and 6B.
Side handles are available for a number of the commercially produced handle systems, and some cranked handles are available, so these may also be an option for increased control.
See Photo 7.
Moving on to the lathe, it may be helpful to extend locking levers a little to increase leverage. If longer levers would get in the way, a length of tube with a handgrip achieves the same result, but is removable.
If your hands are already occupied with turning tools, a foot switch to turn the lathe on or off can be very convenient. Those who use them wouldn’t be without them.
I hope you’ll now be able to get a better grip on your tools and enjoy your turning.
See related articles containing complimentary information:
If you can contribute to this bank of knowledge for turners with physical challenges, please get in touch via [email protected], alternatively participate in the "Woodturning Health & Safety" section of the AAW Forum to ask questions and discuss ideas. (You will need to set up an account to access and participate in the AAW Forum, click here.)
About the Author
Chris Grace has used a wheelchair full-time for a many years, and
gained experience of other disabilities while head of diversity for a
large government department in the UK before forming a hospitality
consulting business. His analytical approach enables him to identify and
quickly solve issues encountered by students, some of whom seek him out
to help overcome difficulties due to their disabilities. Chris has turned
professionally part-time for a number of years, regularly demonstrating
and teaching as well as writing for a number of magazines.
You can contact Chris at [email protected] or see his website www.NotJustRound.com.