|
Should I stand or sit?
Let’s sit down and think about this.
I can’t get to grips with these tools.
Videos
Return to Physical Limitations Main
|
| |
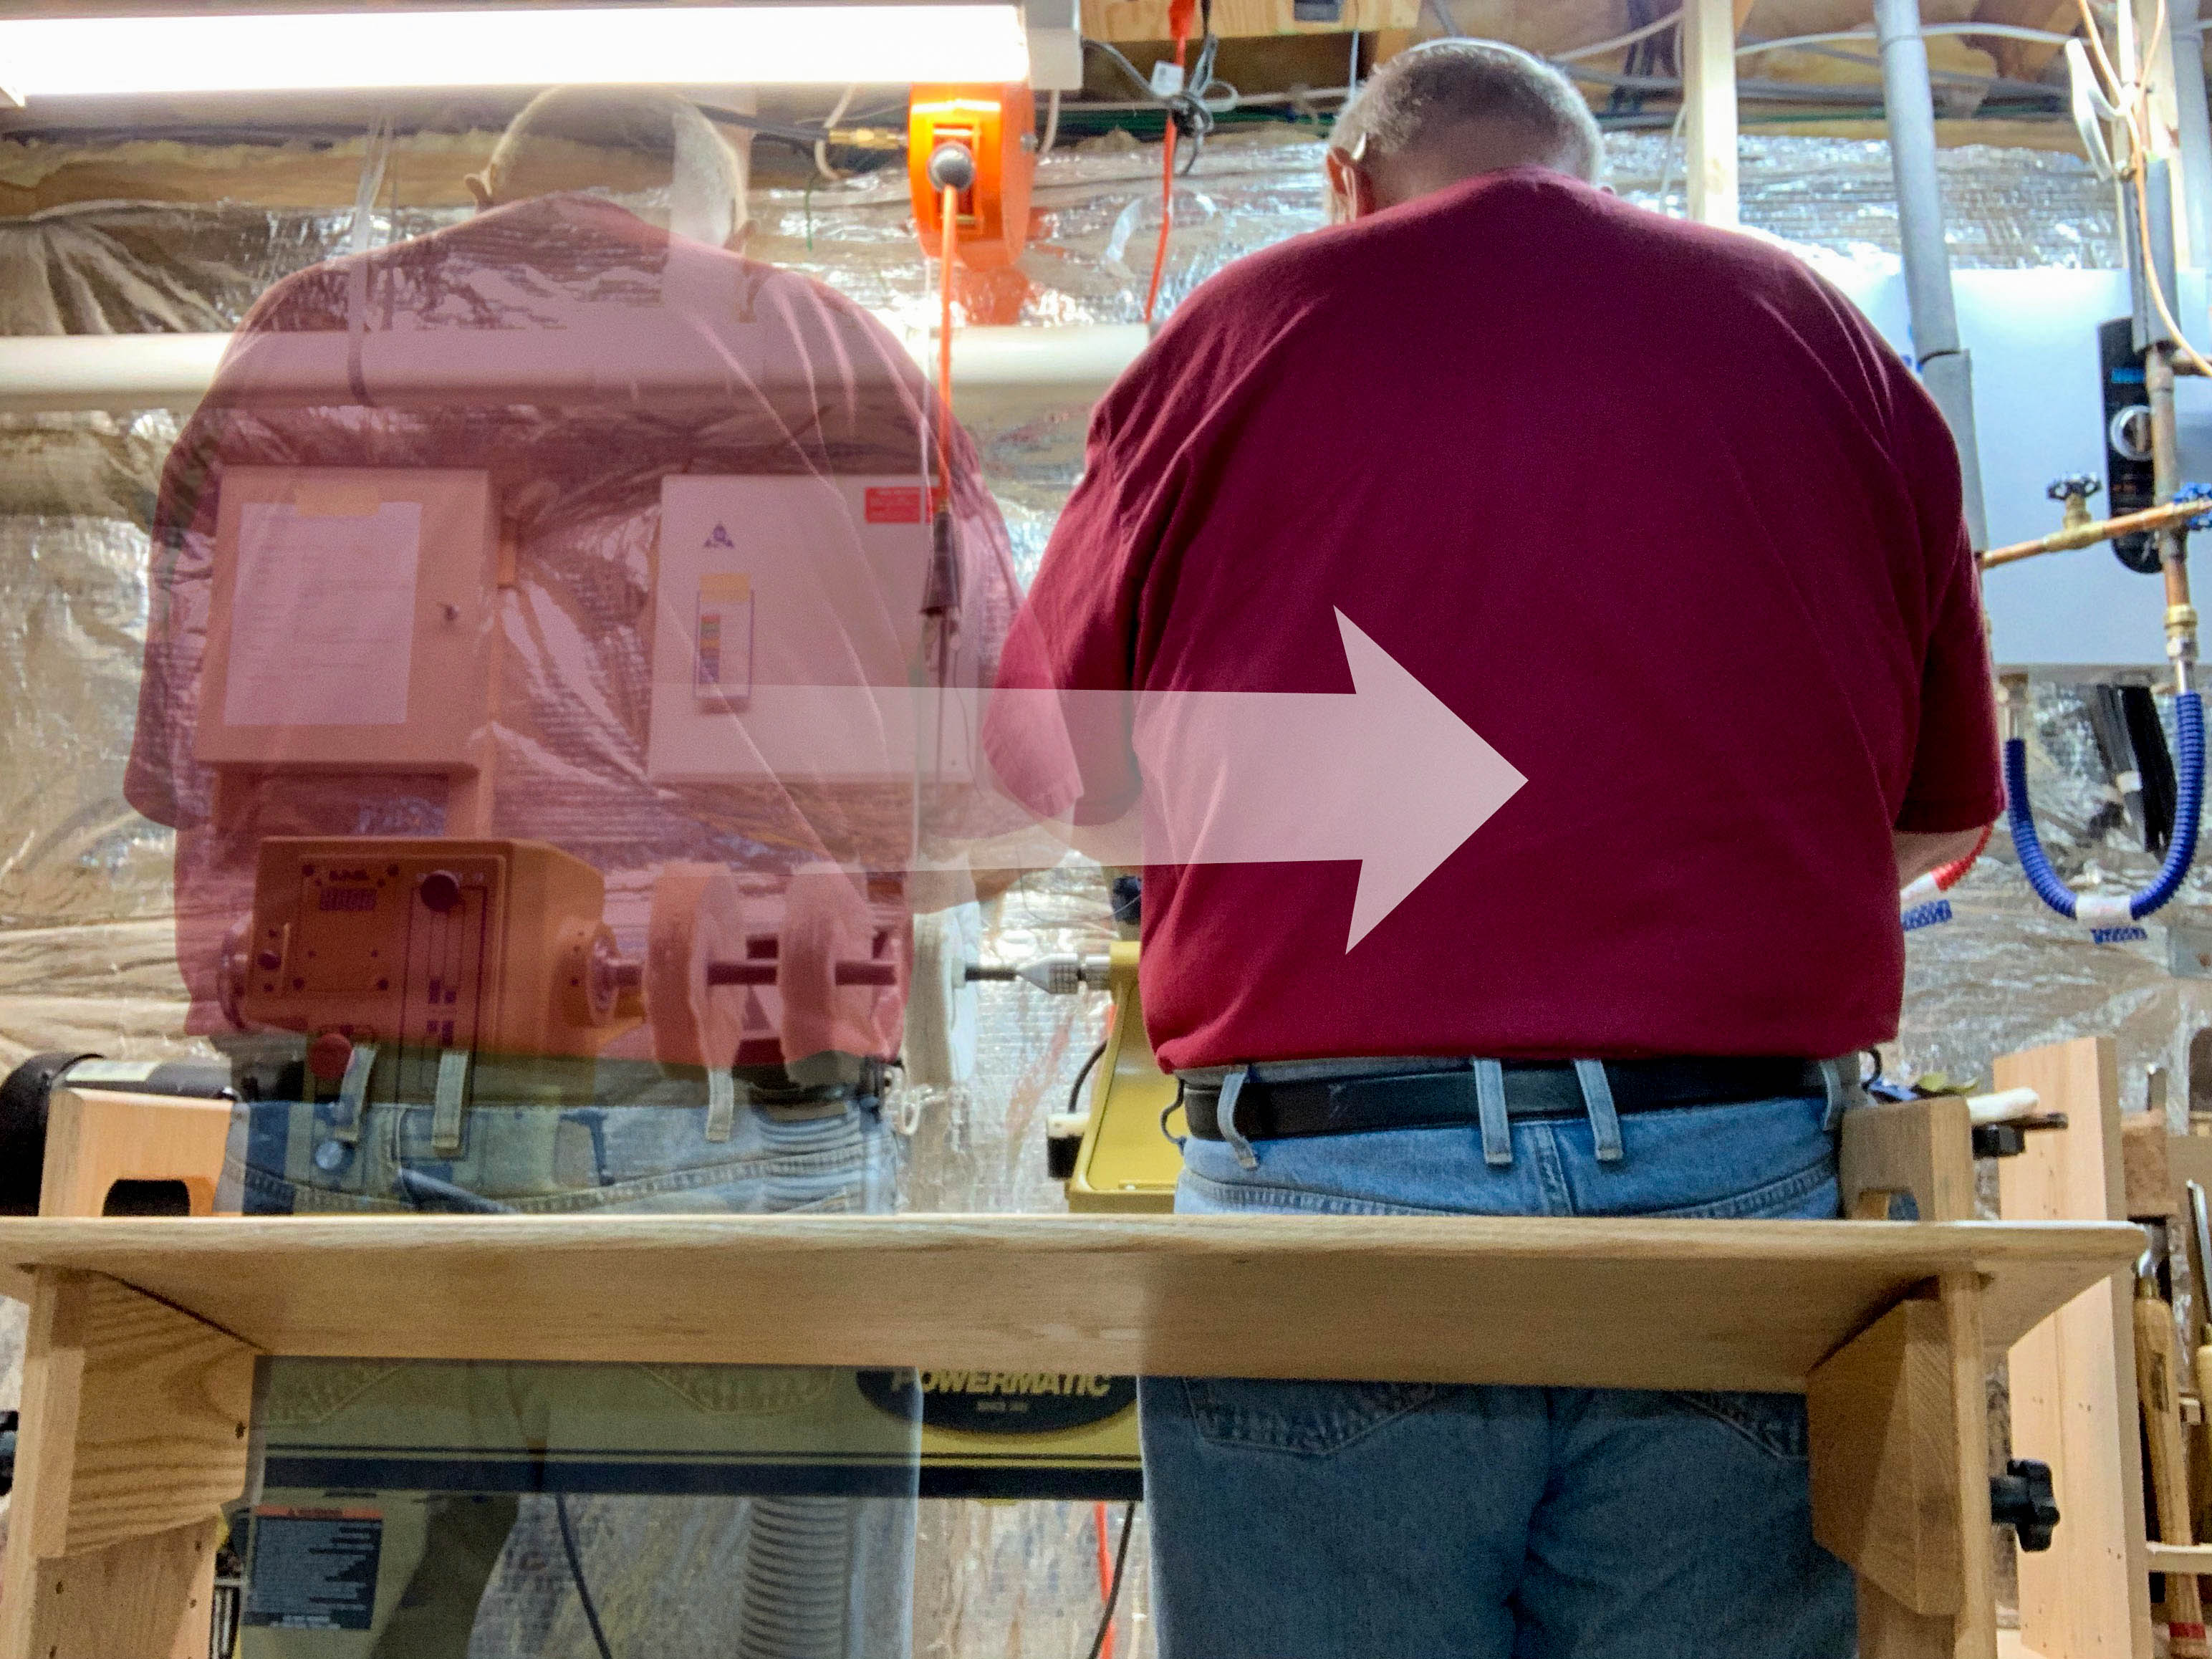 |
Photo 1: A perch bench gives you something to rest on while enabling you to move sideways easily and stand when required.
(This pose is a simulation to illustrate use of a perch bench. In actual turning, the turner would be wearing a full faceshield.)
|
| |
 |
Photo 2: Simply using a high stool may provide sufficient support though there is less ability to move laterally.
(This pose is a simulation to illustrate use of a high stool. In actual turning, the turner would be wearing a full faceshield.)
|
| |
|
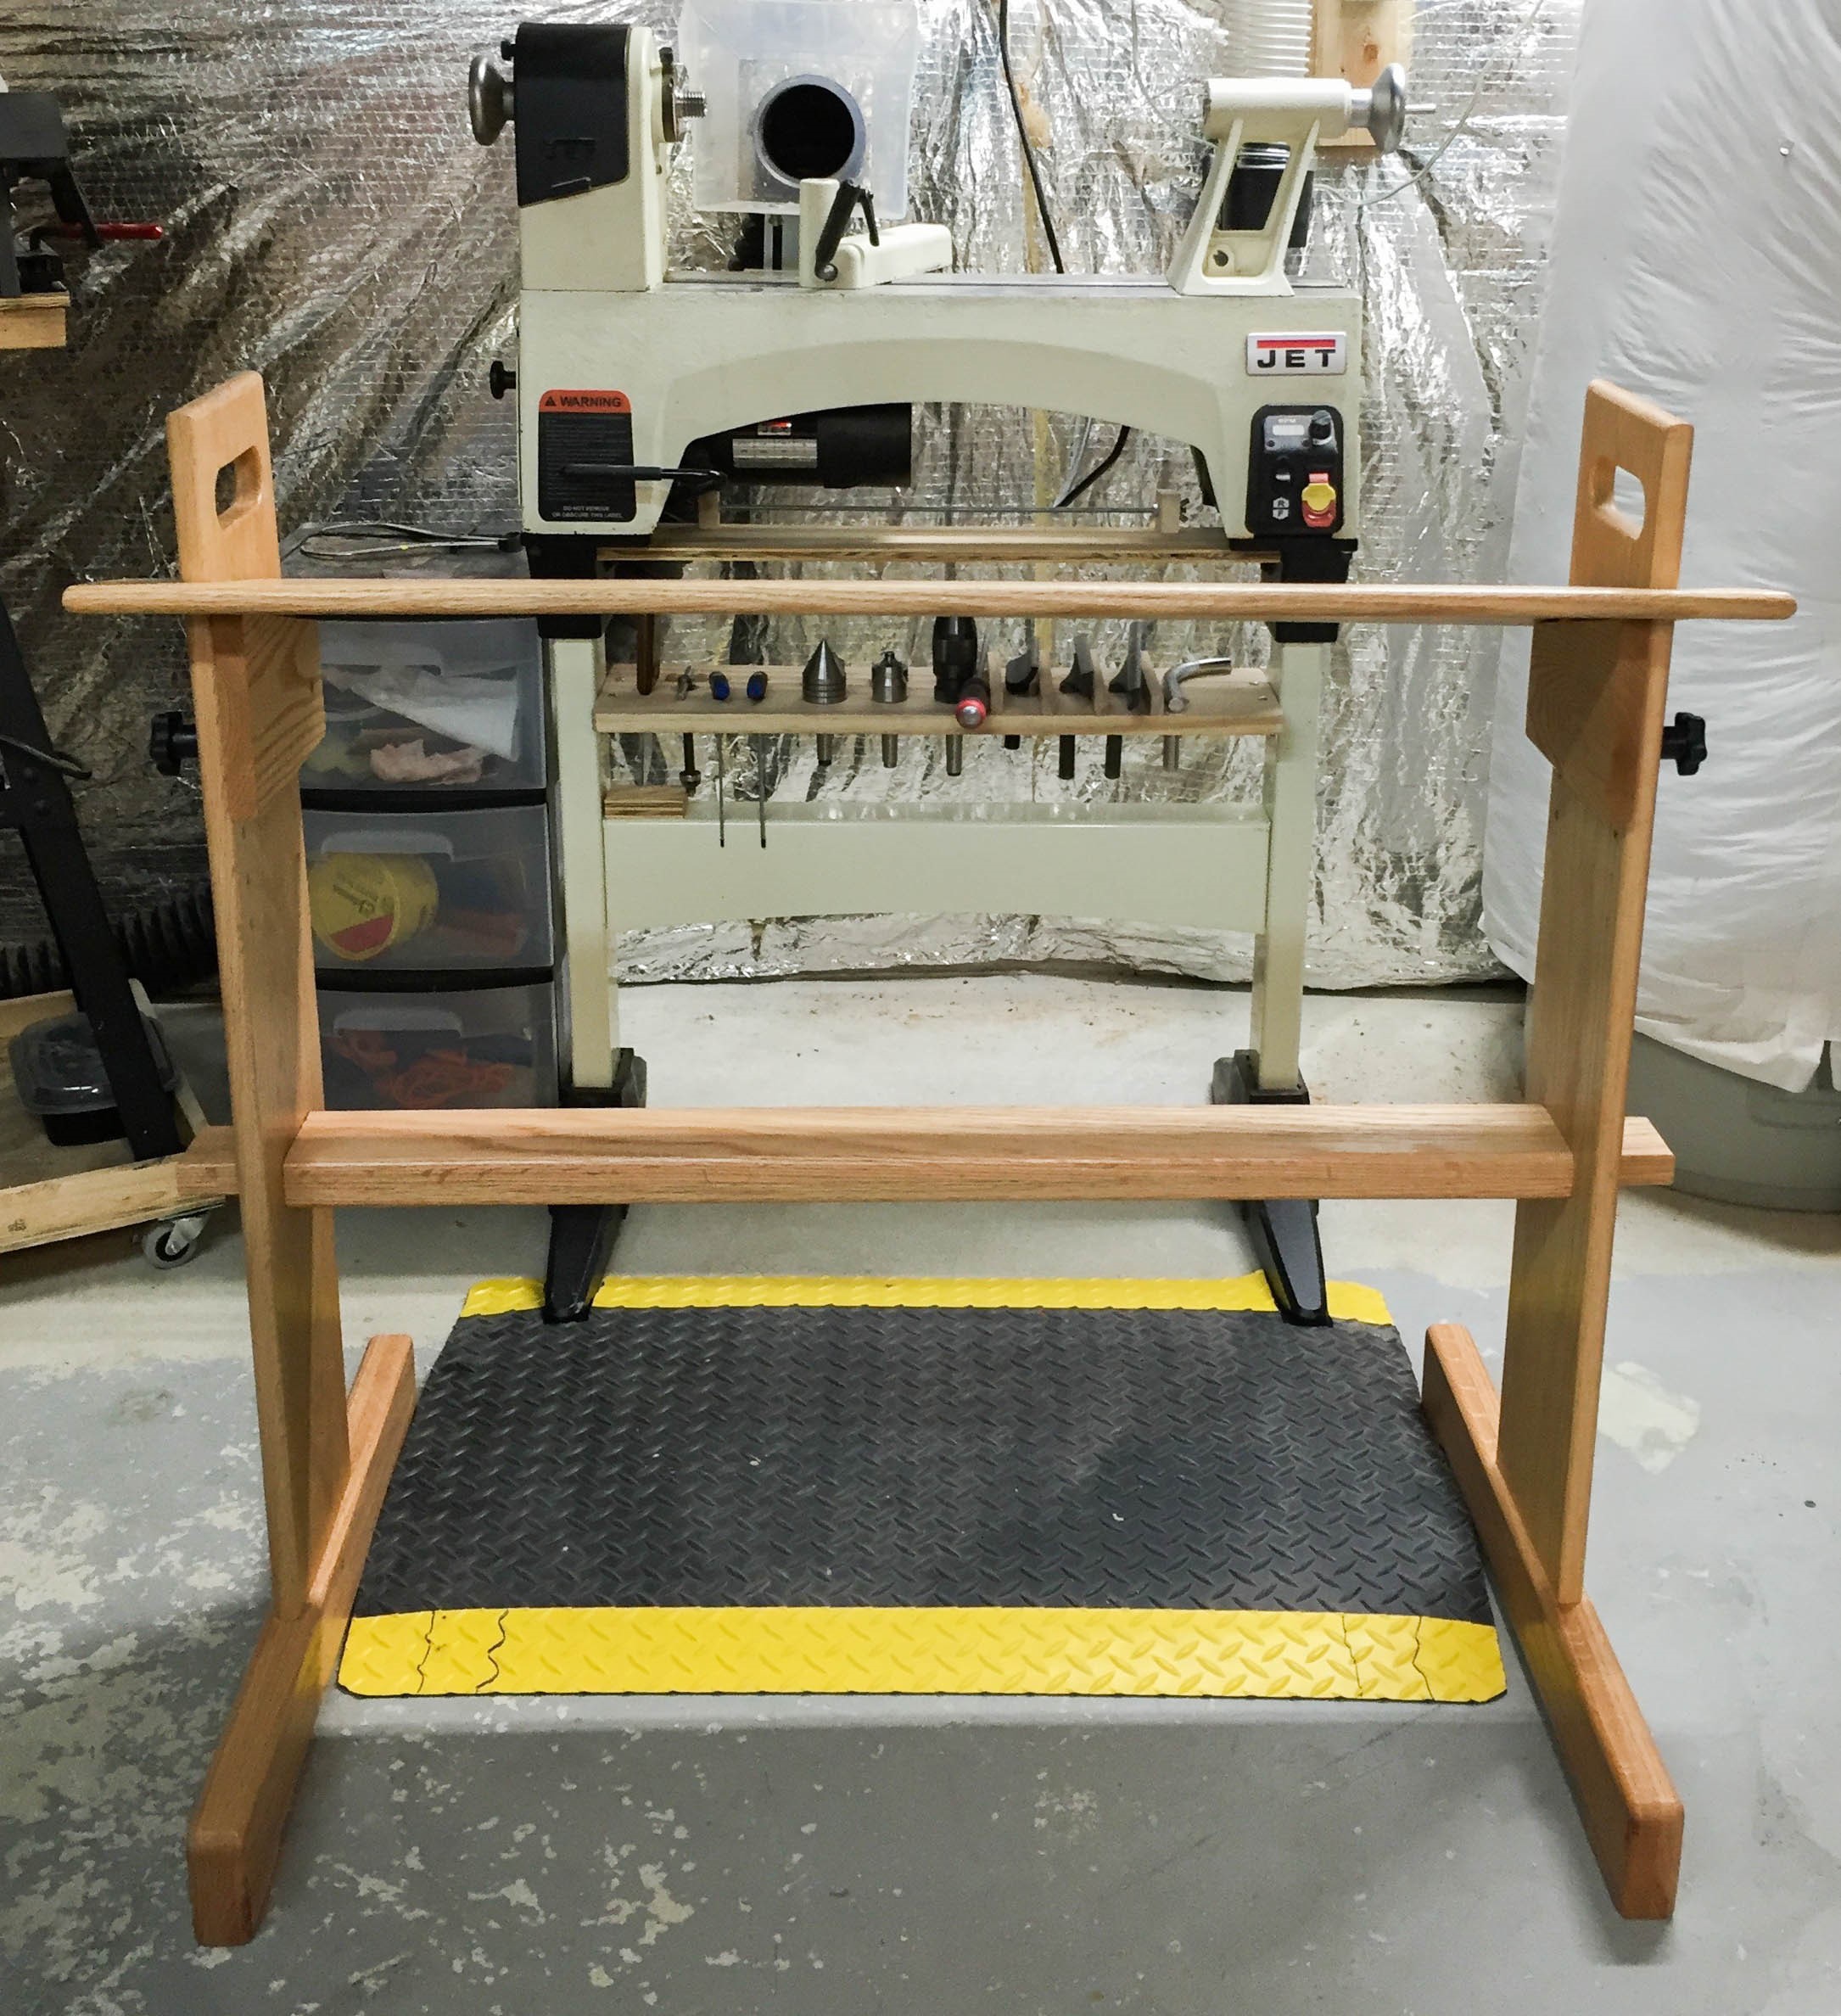
| Photo 3: A perch bench made by turner RC to meet his needs, similar to a
weaver's loom bench enabling sliding with foot/leg control. |
| |
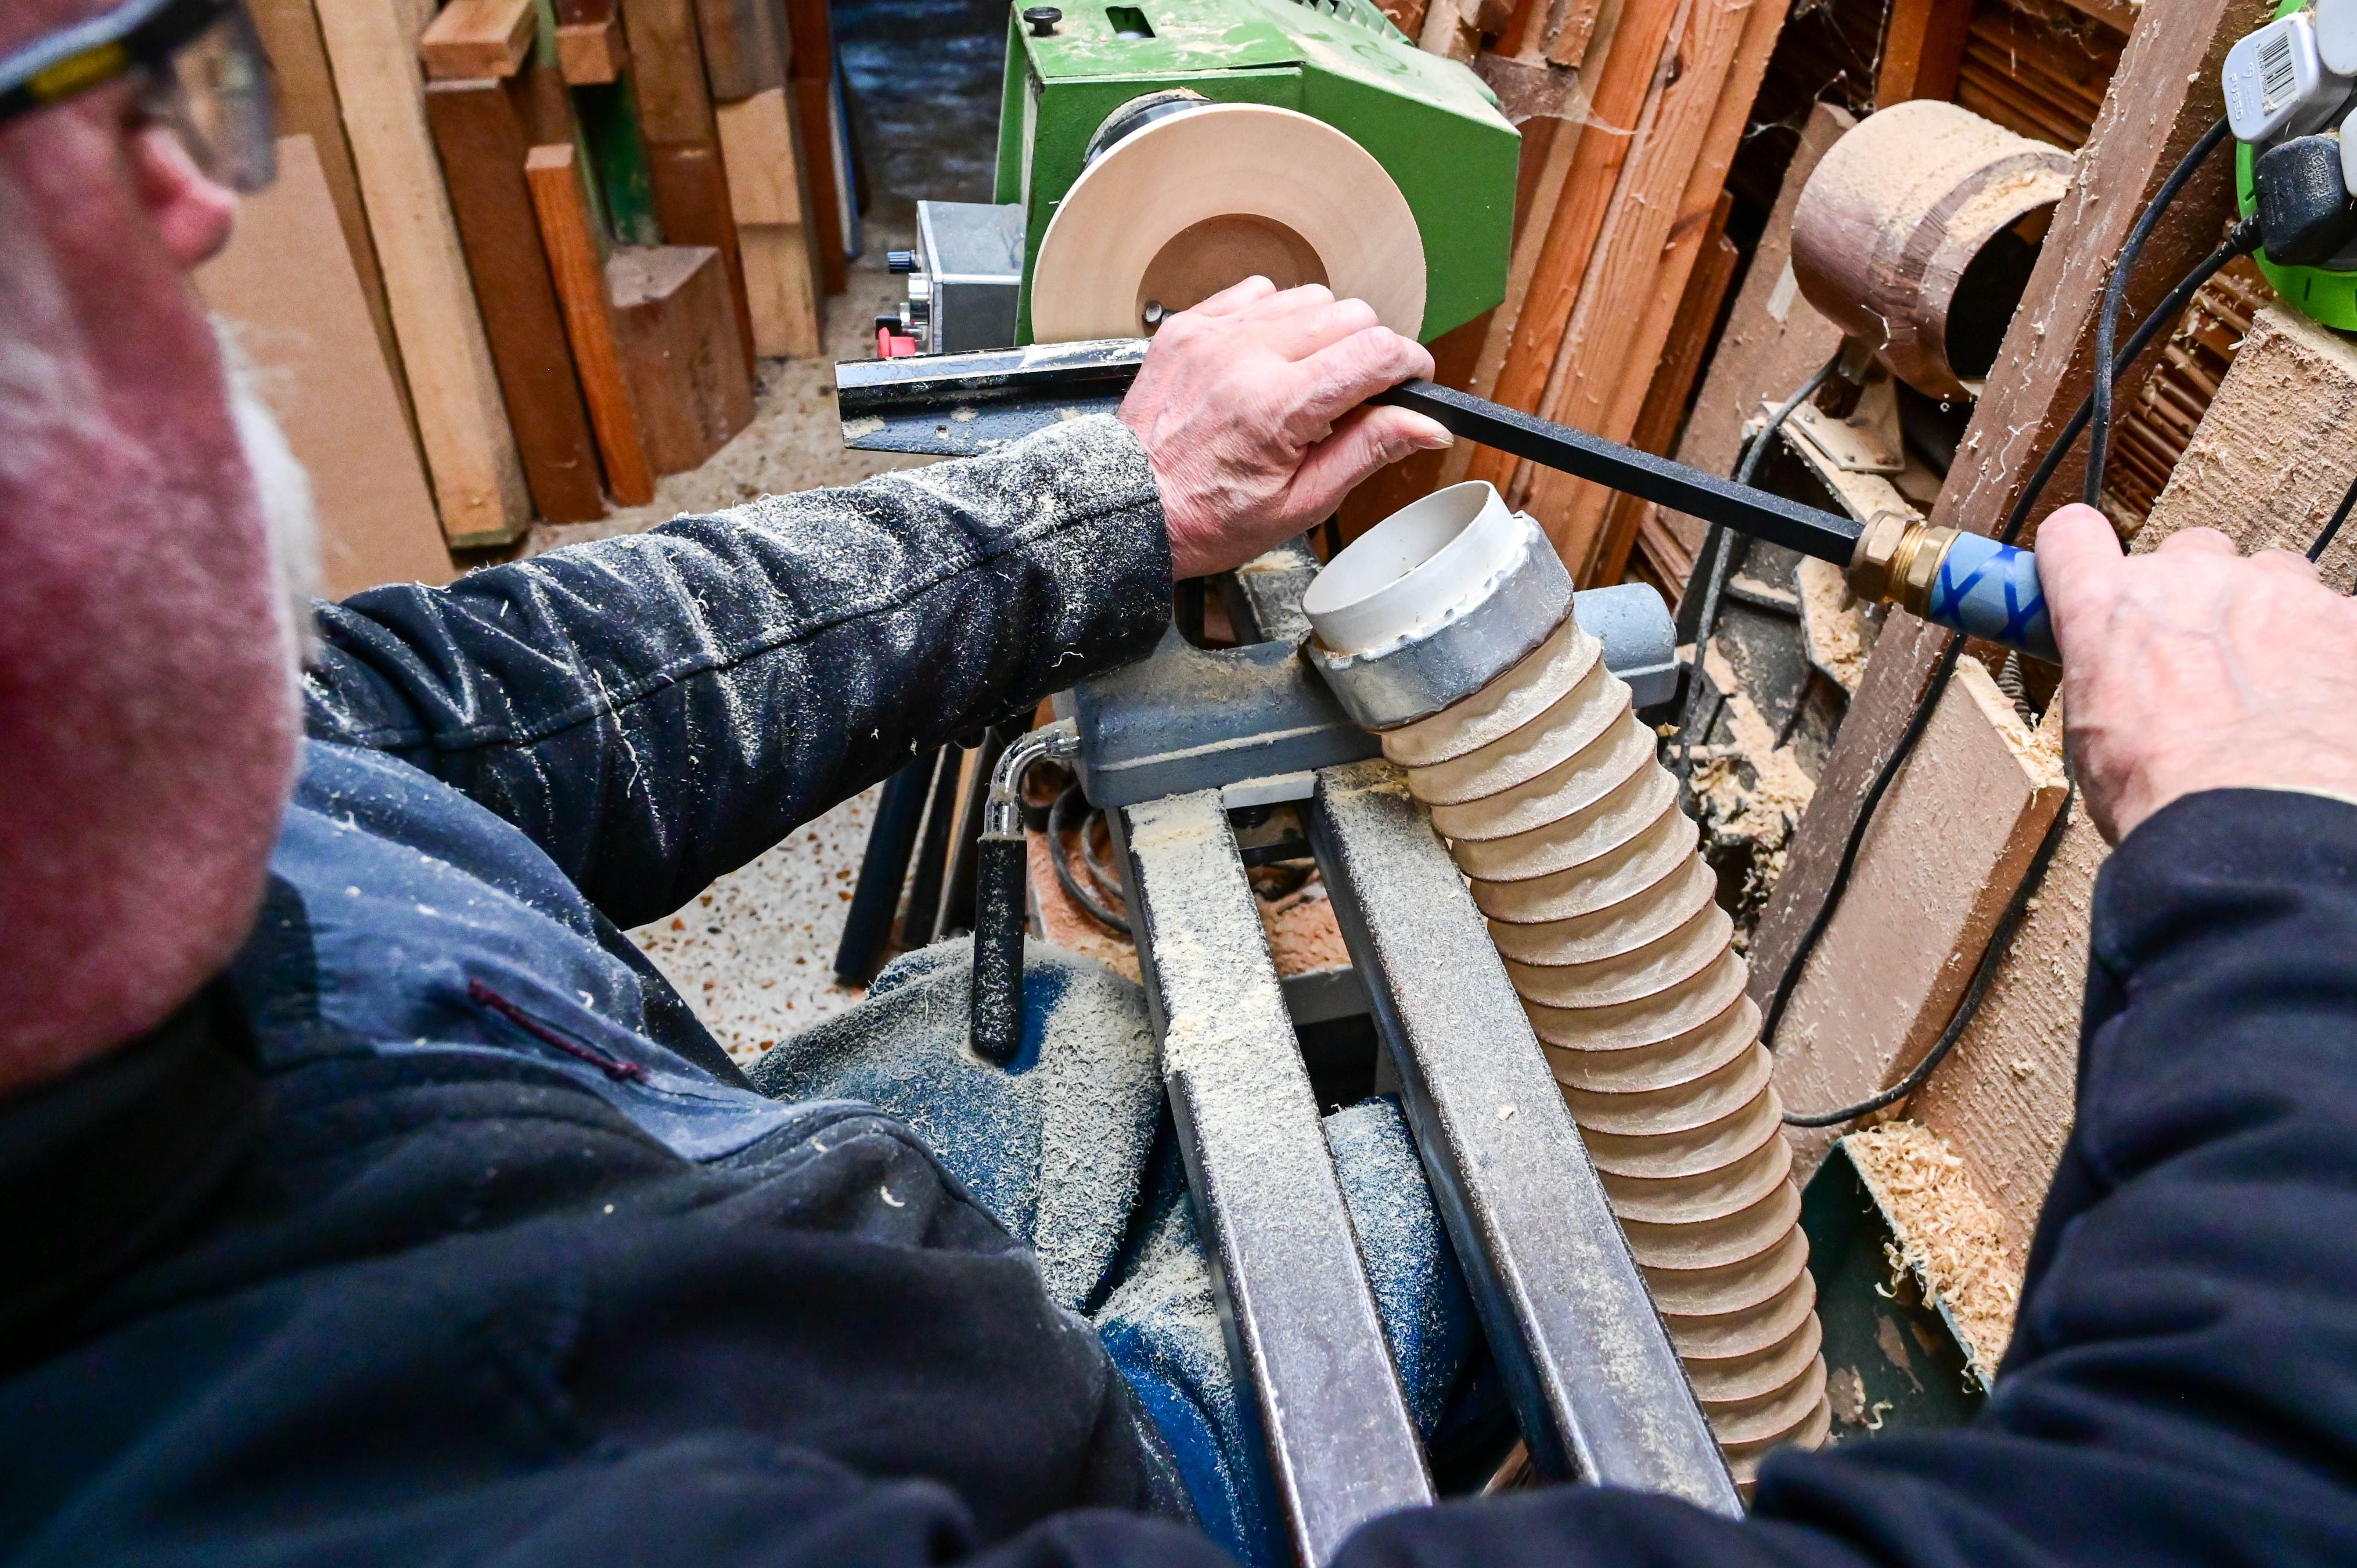 |
Photo 4: Cupped carbide tipped tools require slightly different presentation angles that can help with a more comfortable posture.
(This pose is a simulation to illustrate presentation angles. In actual turning, the turner would be wearing a full faceshield.)
|
| |
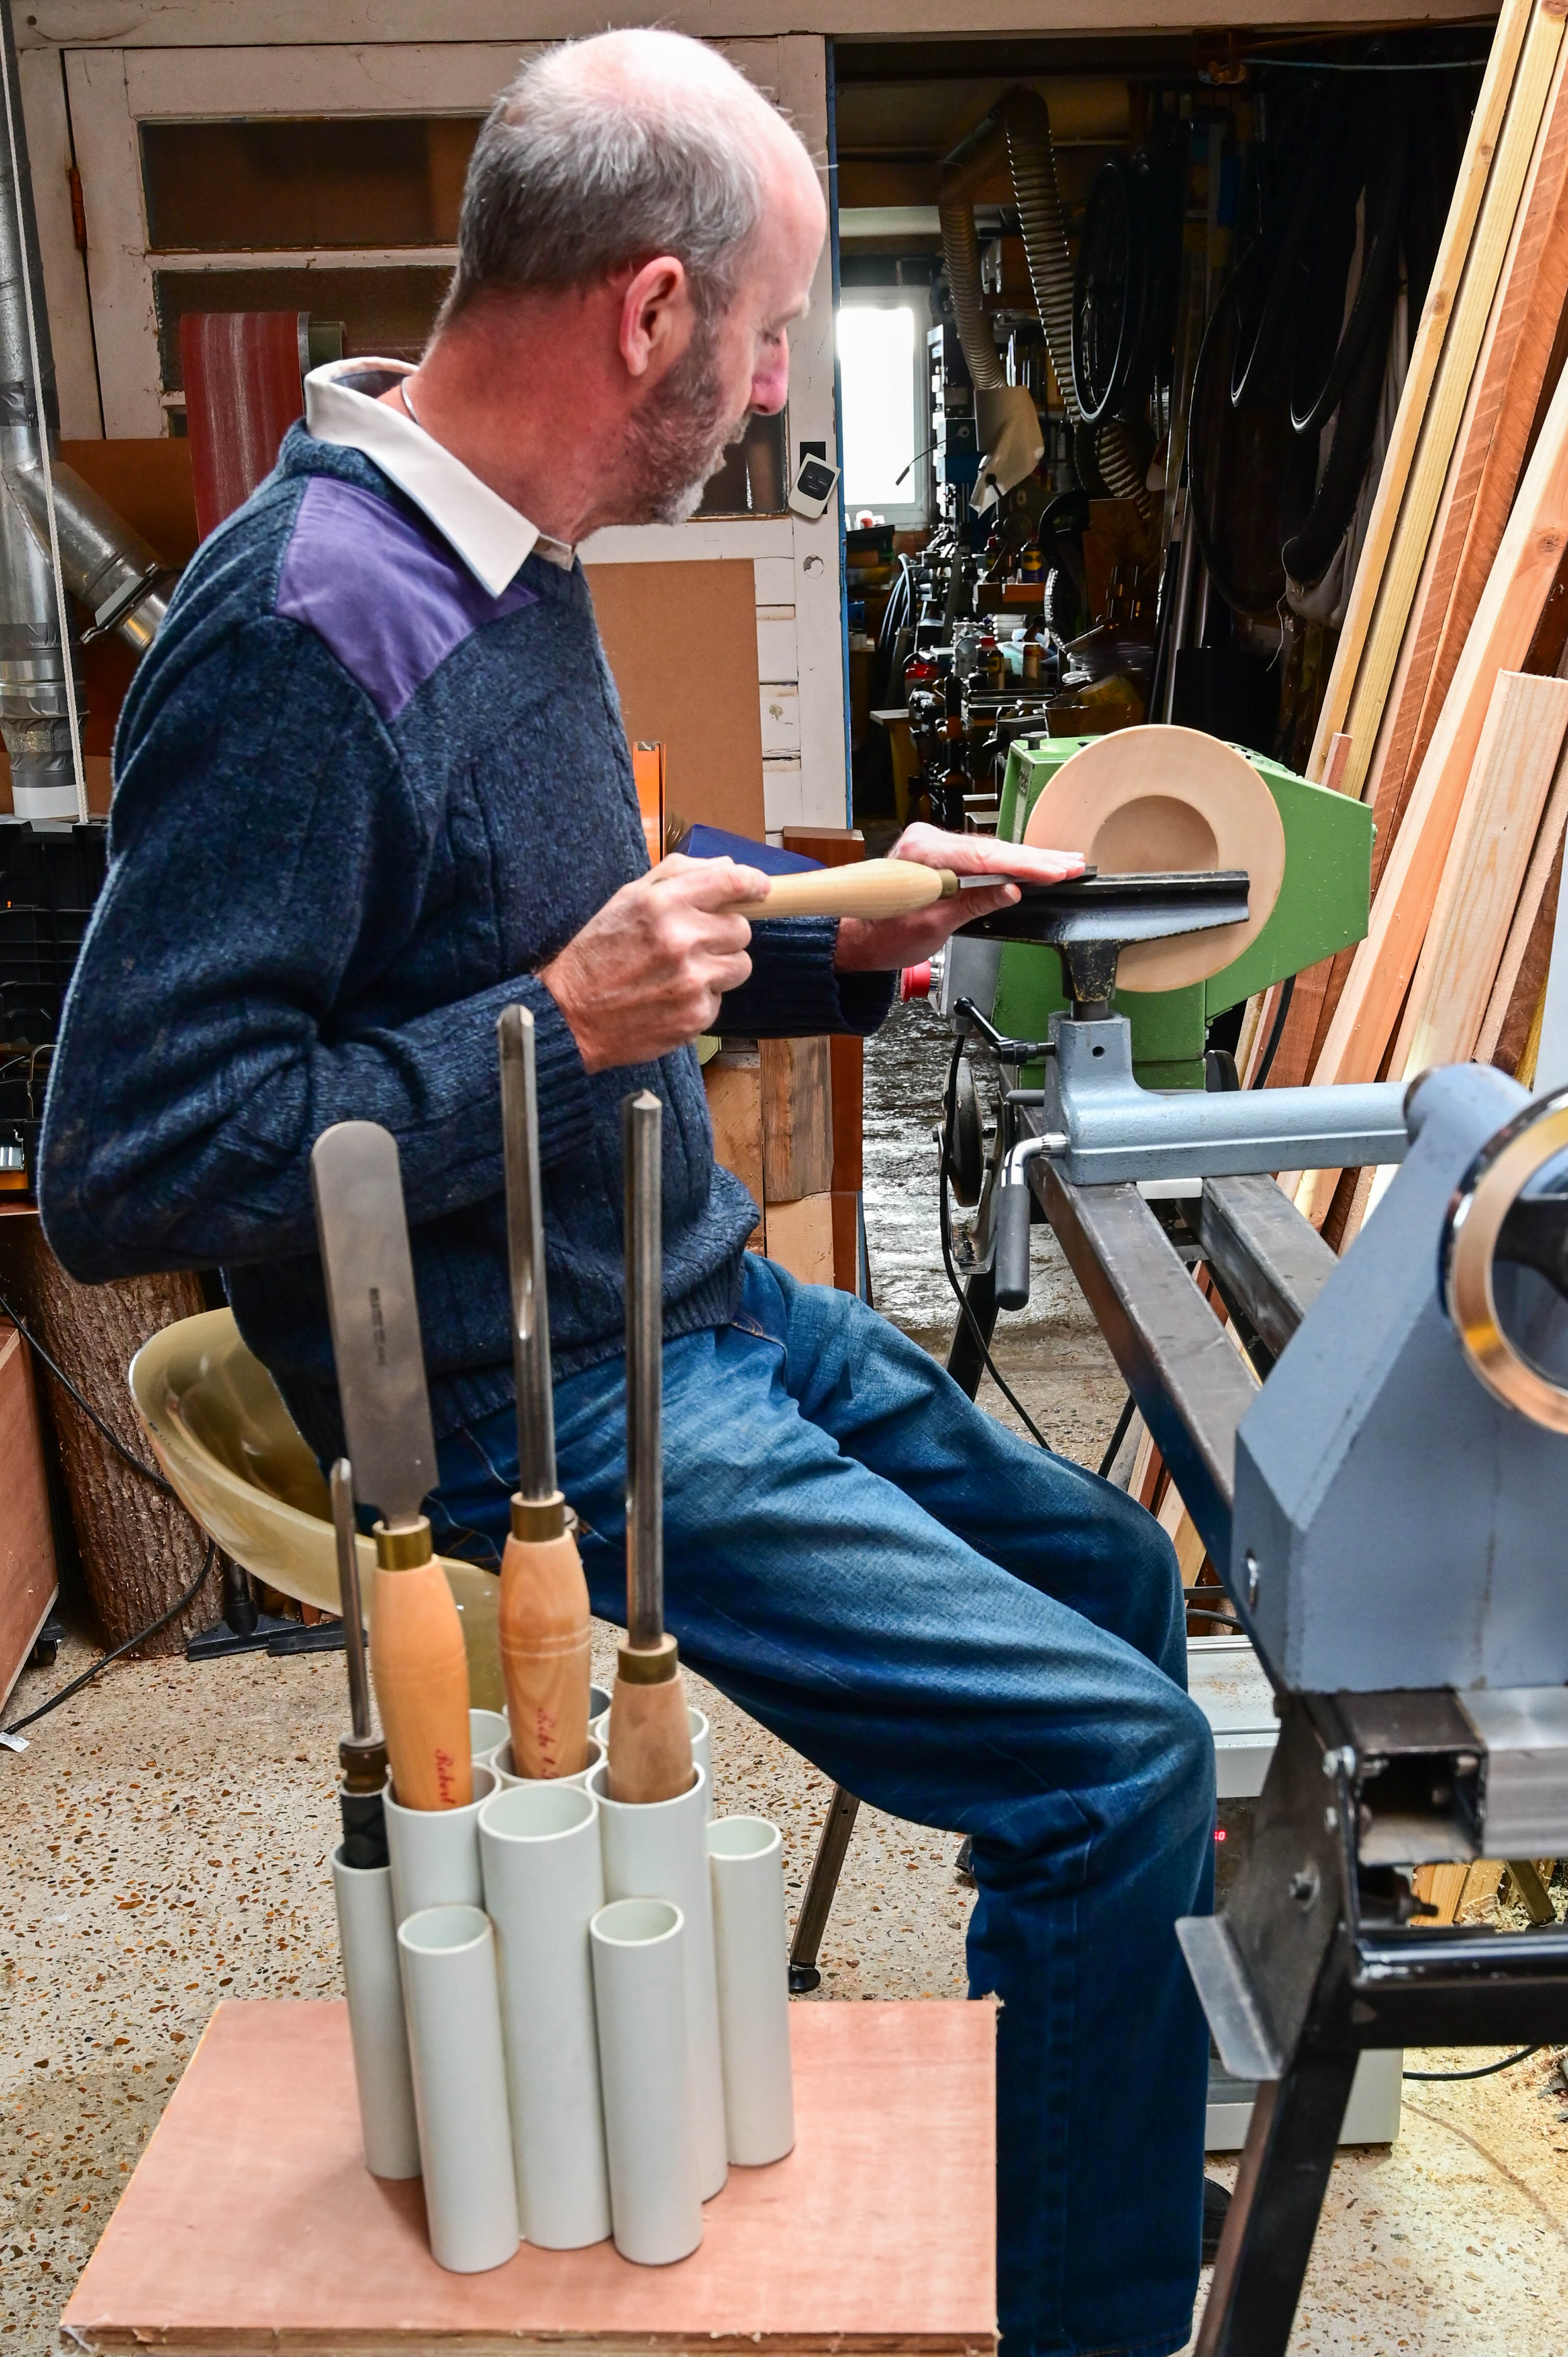 |
Photo 5: If you have difficulty moving around, keeping tools within reach can help.
(This pose is a simulation to illustrate keeping tools within reach. In actual turning, the turner would be wearing a full faceshield.)
|
| |
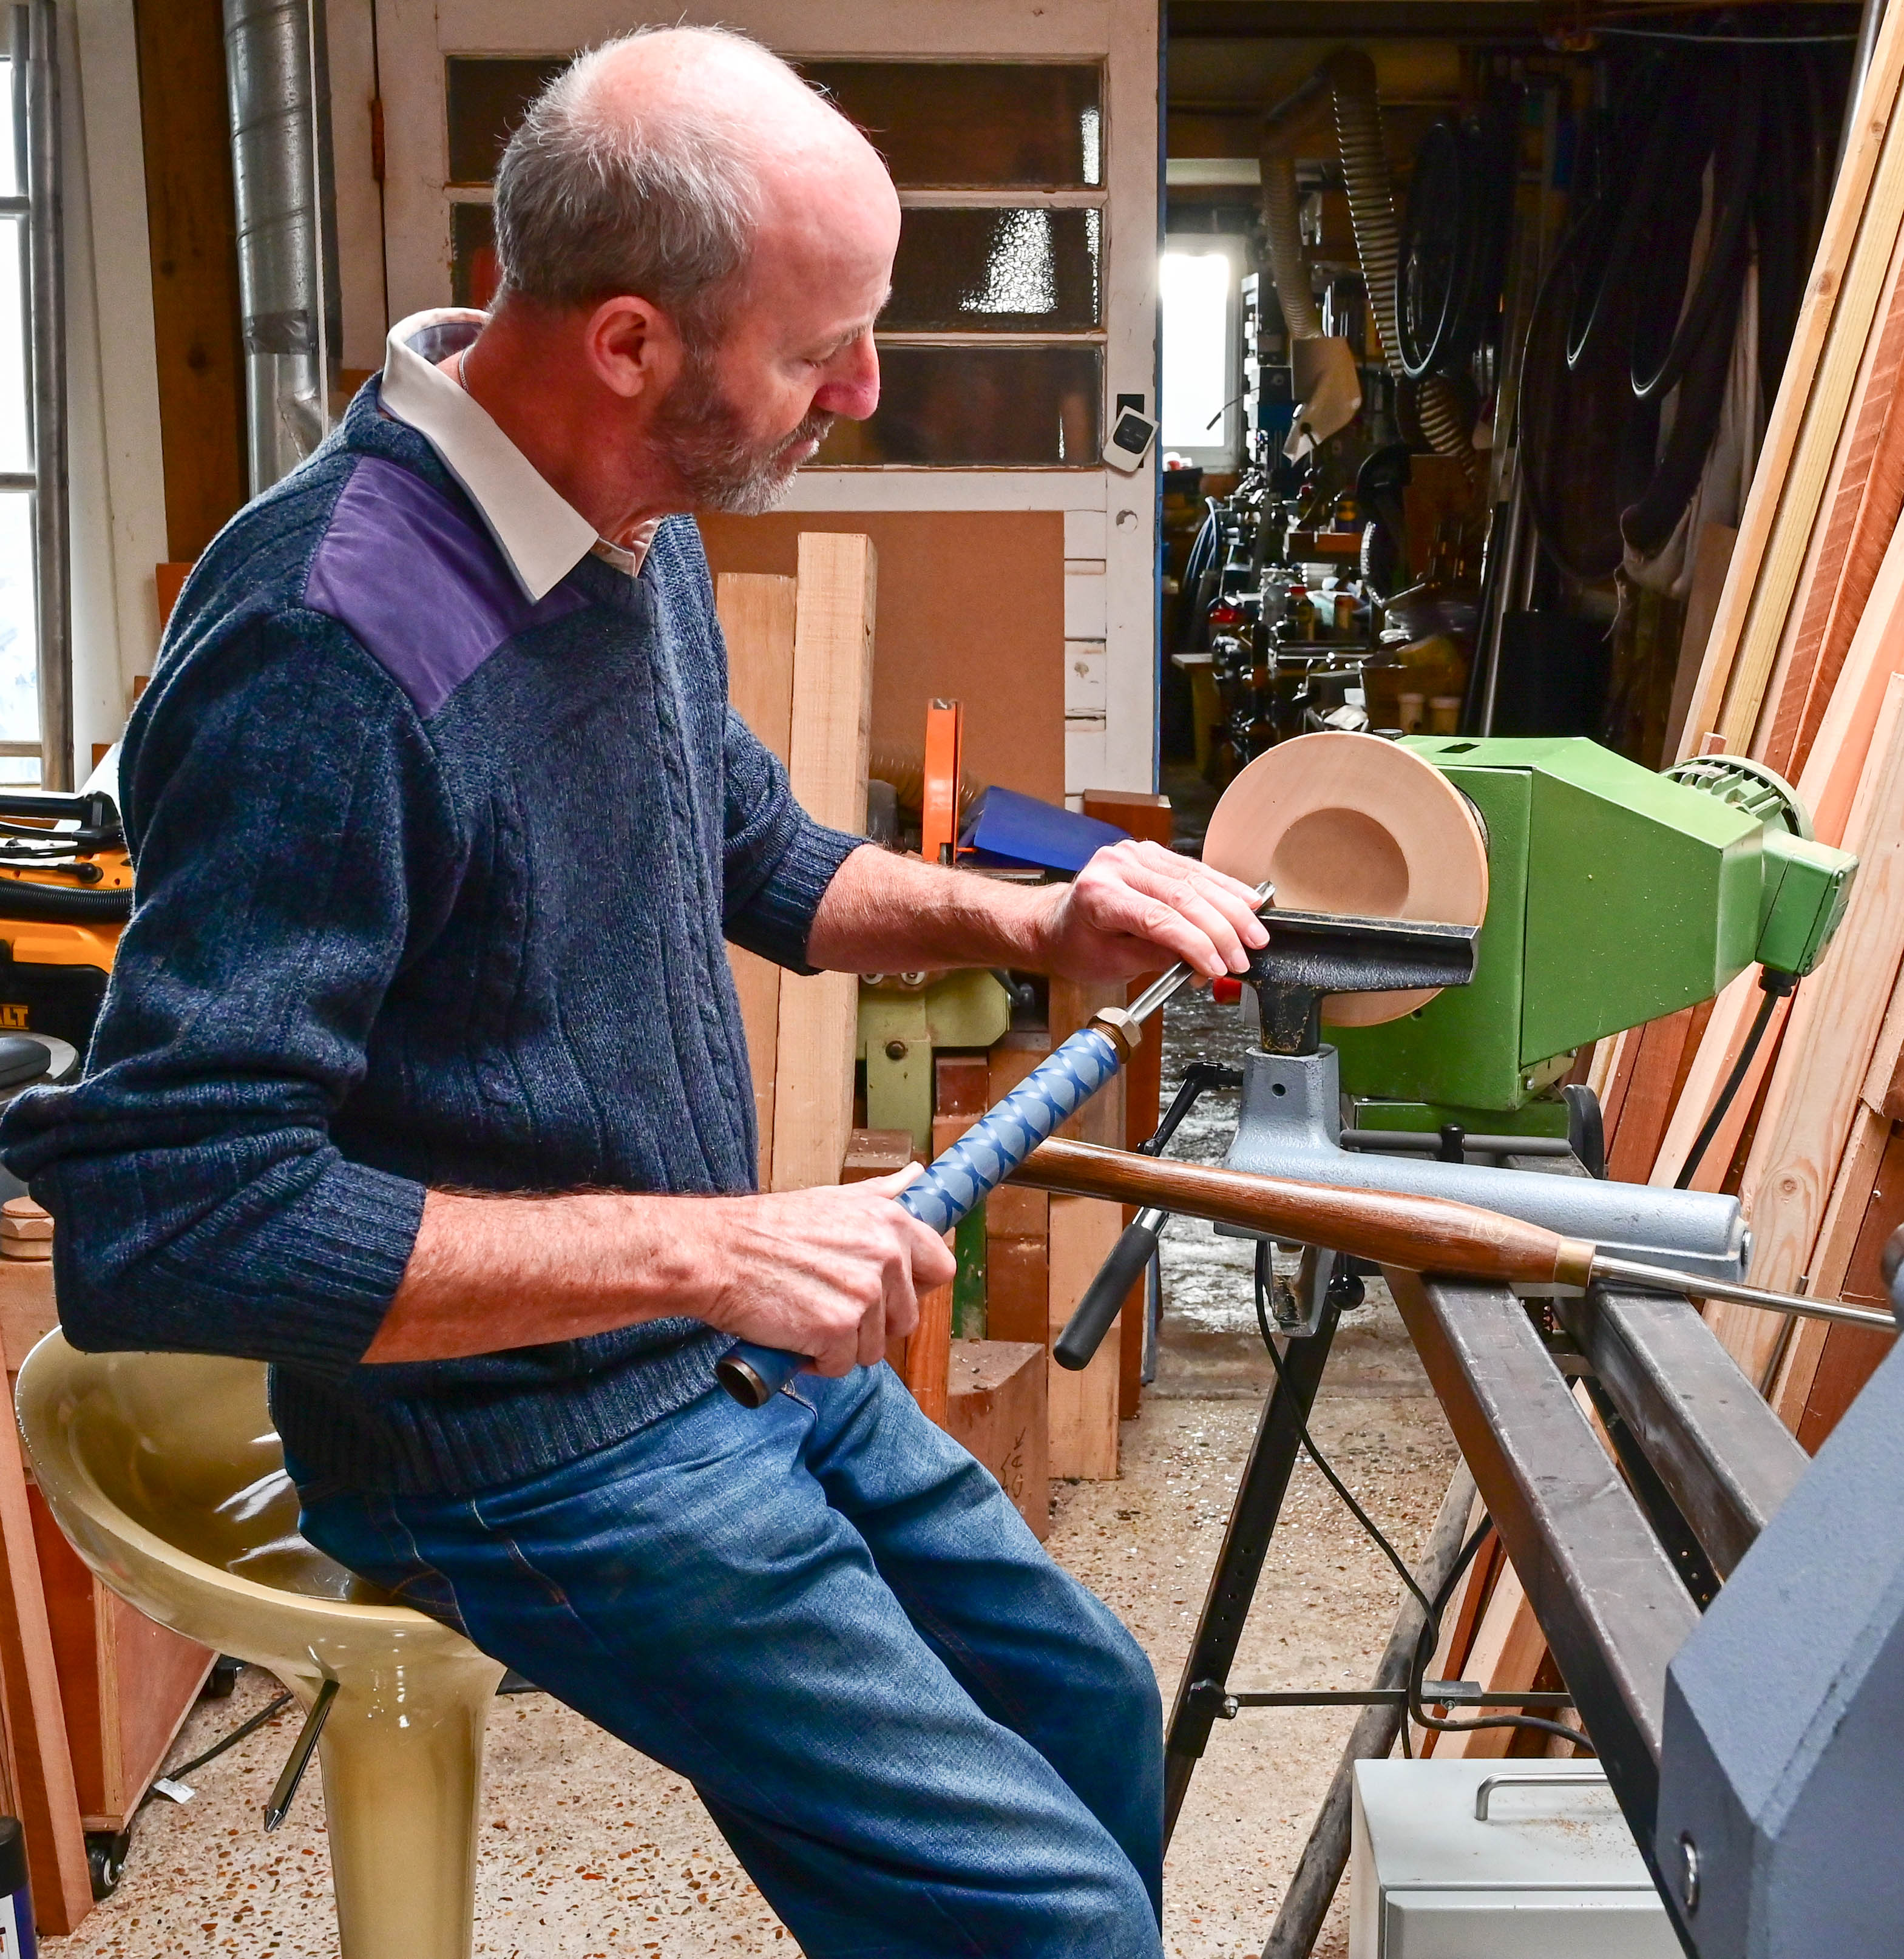 |
Photo 6: You can often achieve a more comfortable turning position with the headstock rotated. Here Mike is checking which tool will work best and enable him to achieve the cut comfortably.
(This pose is a simulation to illustrate turning position. In actual turning, the turner would be wearing a full faceshield.)
|
| |
 |
| Photo 7: If you can’t swing your body to achieve one continuous cut, you can learn to pick up the cut by adjusting your position and possibly your toolrest. |
| |
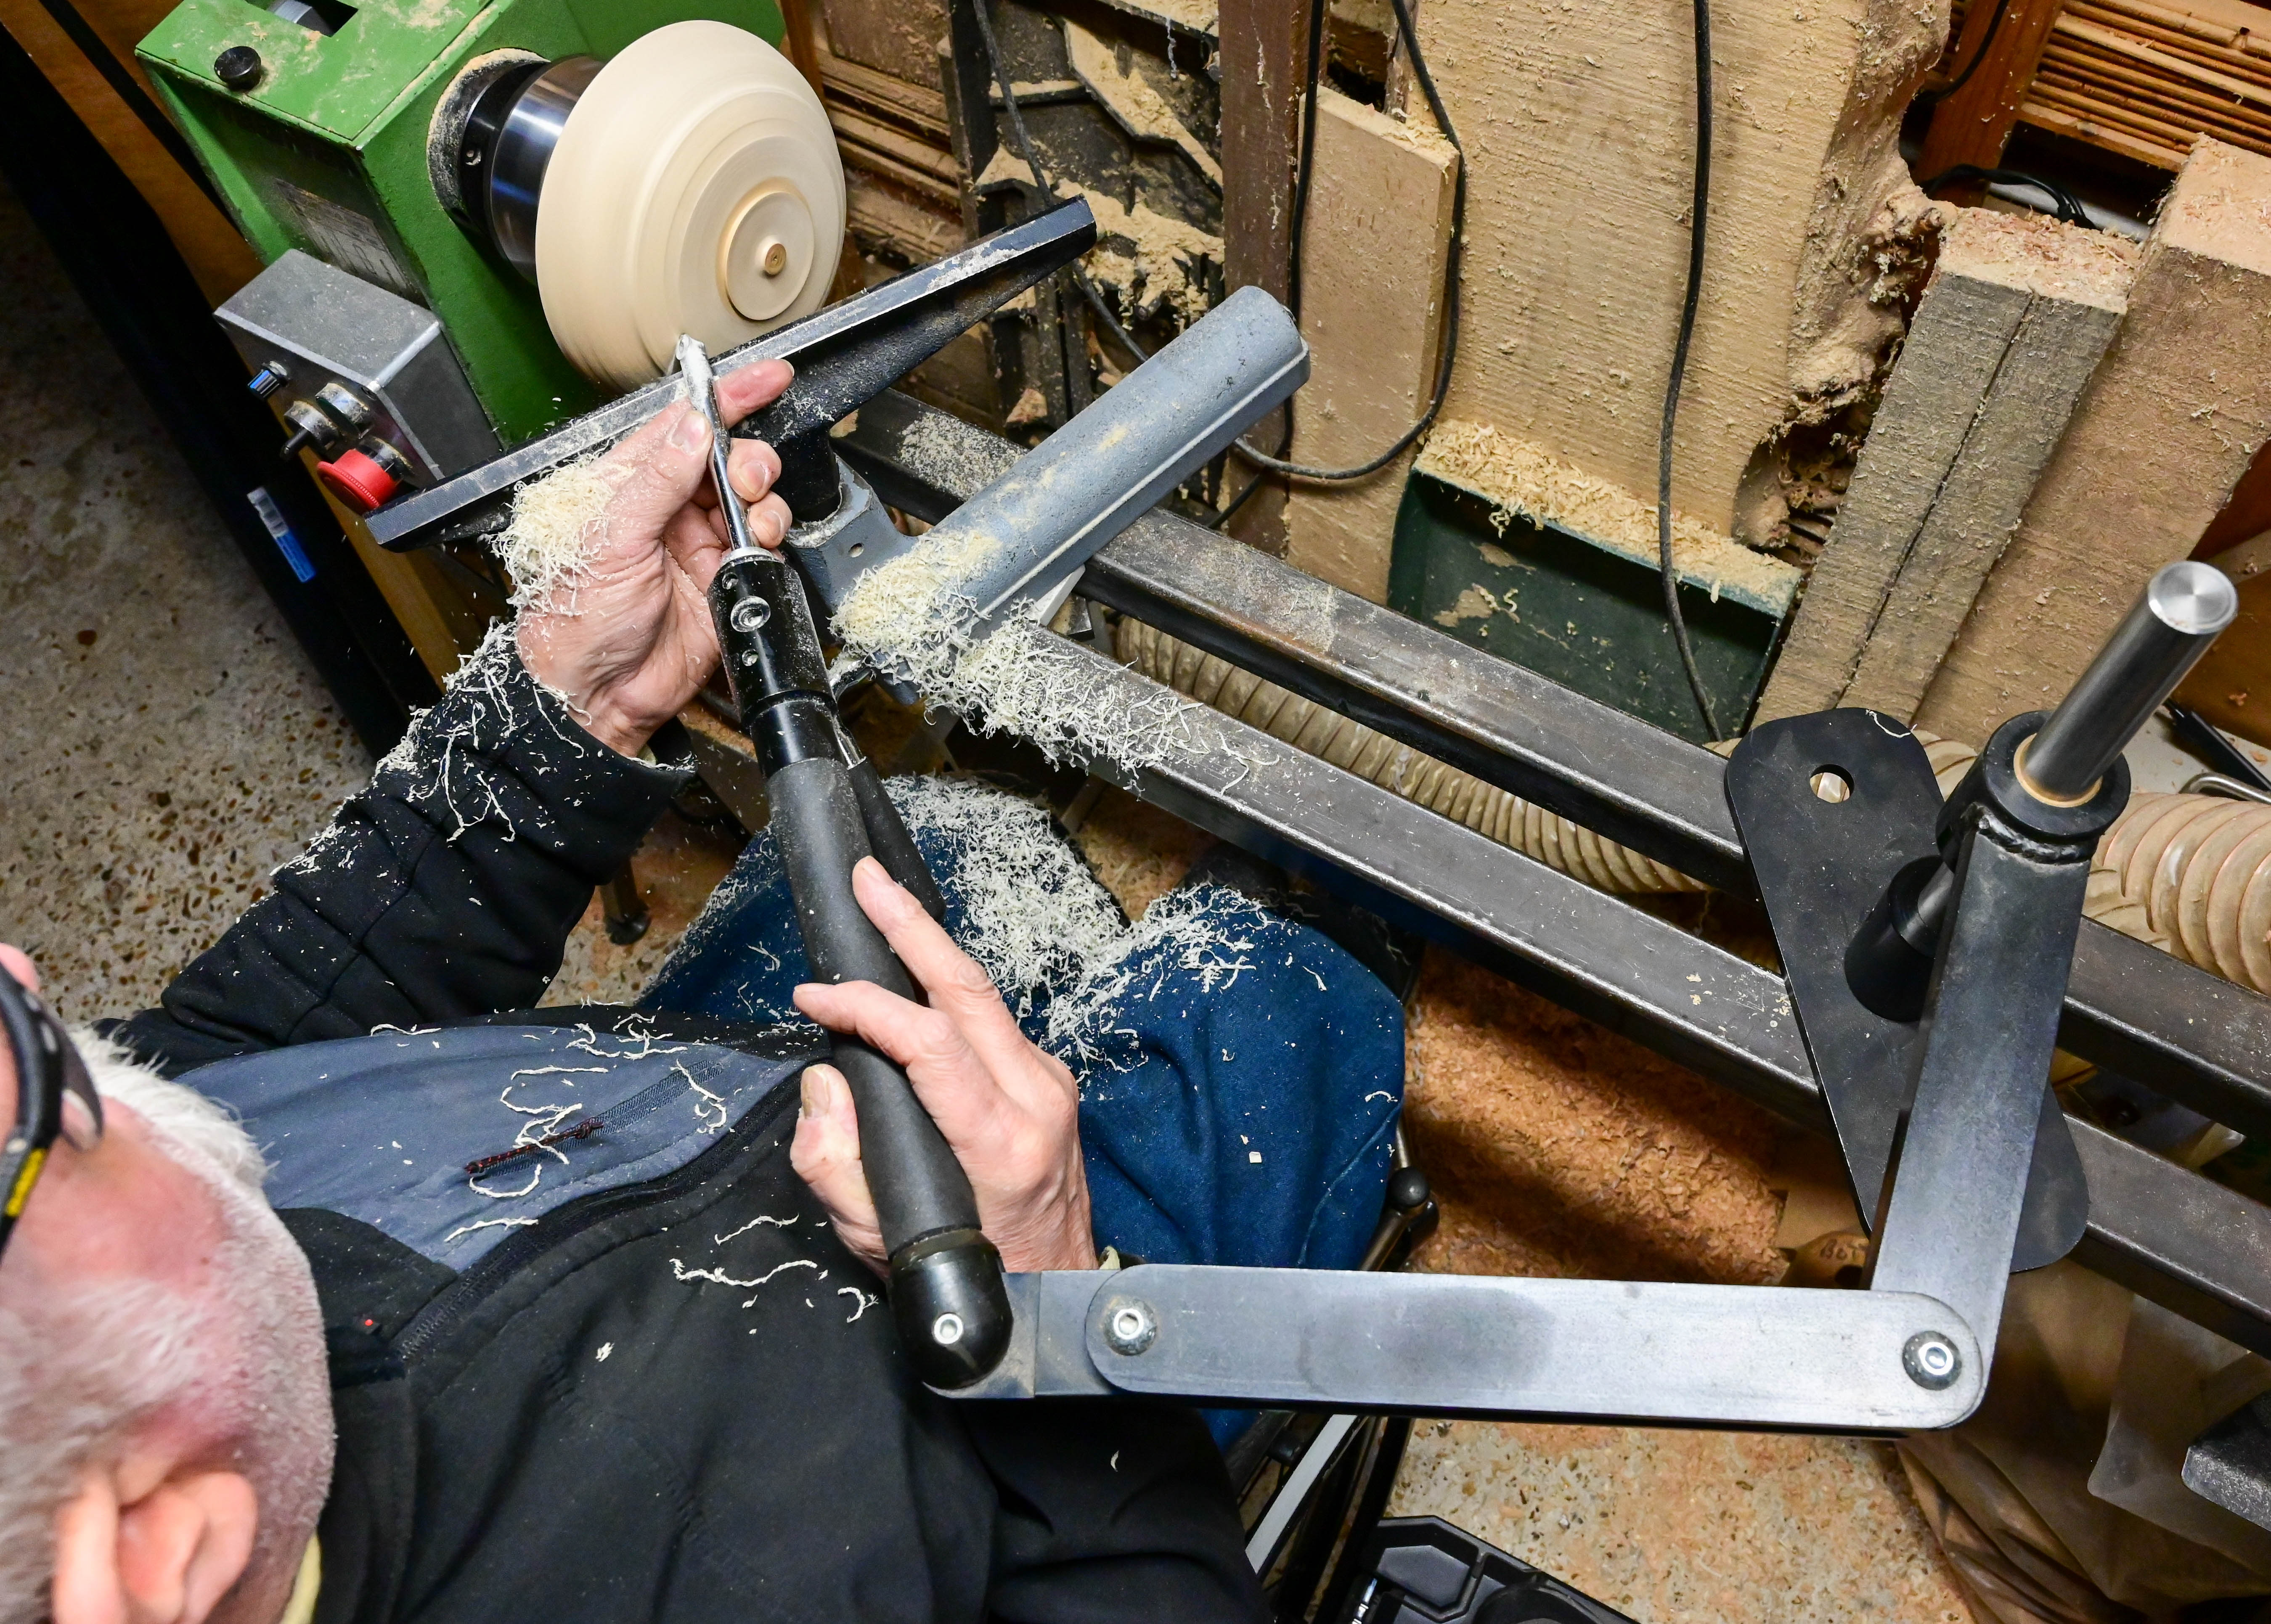 |
Photo 8: Using a hollowing rig can take some of the strain out of turning. Yes, they can even be used on the outside of turnings.
(This pose is a simulation to illustrate how a hollowing rig can be used to reduce strain. In actual turning, the turner would be wearing a full faceshield.)
|
| |
I can't stand turning!
There are many reasons people have difficulty standing at a lathe for any length of time, and some can't stand at all. Let's stand back and have a think about this. Turning wood is a fun hobby and physical issues need not prevent us from enjoying making shavings.
If you’re new to the hobby, rest assured there are solutions to most challenges. If you are already experienced, there’s no need to give up. So, if you encounter difficulties, don’t just grin and bear it, let’s look at some options that may help.
Sometimes it’s just more comfortable to take the load off our feet.
See Photo 1.
Which option is right for you?
- If standing for long enough to turn is uncomfortable, then using some form of support, say a perch seat, can work well with a standard height lathe. This has the added advantage that you can quickly stand when necessary to extend your reach, etc.
- If you have more difficulty with standing, or have poor balance, you might benefit from greater support, so using a seat with a lower lathe is worth considering.
- For anyone who uses a wheelchair, lowering the lathe may be the best choice to achieve a comfortable turning position maximising arm movement.
Don’t be shy about exploring and trying solutions. The extra benefits can be liberating.
A lower lathe is sometimes combined with tilting it. We will discuss these together with grip/arm issues in Let’s sit down and think about this.
See Photo 2.
Make yourself comfortable.
Irrespective of which options you choose, I believe the most important aspect is being able to turn comfortably. There is a reason why the generally accepted height of a lathe is for the spindle to be at elbow height. Using a wheelchair, I still find that elbow height is the most useful, so I have lowered my lathe to achieve it.
In all cases when you use a seat, there are a number of techniques that can help compensate for any inability to move sideways which you would typically do when standing. We will look at some of these below.
Perch Seat
A perch bench is probably the most flexible option – think of it as a toolrest for your bottom. Weavers use a bench for comfort and that concept could be adapted. Using a perch seat, or high stool, enables you to use your legs/feet for added support on the floor, as well as for lateral control and balance. If you try a change like this, make a point of assessing how it feels periodically to ensure it meets your needs and adapt as appropriate to get the most out of it.
Continuous development leads to the greatest benefits.
See Photo 3.
Whilst you may be able to slide along a perch seat, helping with your tool movement in the way that swinging your hips might, this is a limitation when using a stool without wheels. However, you may be able to stand for short periods to achieve tooling motions that are difficult when static.
I make most of my mistakes when I’m getting a bit tired and haven’t stopped for a while. A change is as good as a rest and isn’t necessarily unproductive – use it to sharpen your tools and to have a quick break so you can restart refreshed.
Stay Safe: Regular breaks can help minimize fatigue and maintain concentration.
Workshop Safety
What is he talking about safety for? Surely adding a seat means I’m less likely to fall over. Isn’t that safe enough? Well, yes, but you’ve added additional equipment that you’re not used to, and it might become a trip hazard. Tall seats/benches need splayed legs to provide sufficient stability. Also, while seated, you might be tempted to reach a bit too far with the tool and lose your balance. So take care, and think about any issues the new arrangement might create.
Eliminating loose clothing/hair becomes more important if you have restricted your ability to move away quickly with a bench/seat in the way of your escape route.
Efficiency & Comfort
Seats support you but obviously restrict movement to an extent, so it’s necessary to adapt to this and plan your cuts accordingly. When I make cuts I don’t do regularly, I hold the tool up to the wood at the desired angle for both the start and end of the cut to assess the position of my arms and body and to ensure the cut can be made comfortably. This planning helps get my brain in gear, plus I find out if I can’t quite reach comfortably and safely before I’m in the middle of taking an otherwise nice cut. If necessary you can make two cuts, repositioning yourself in between. Picking up a cut is a useful skill.
Stay Safe: If it would help, consider a foot switch to start/stop your lathe.
See Photo 4.
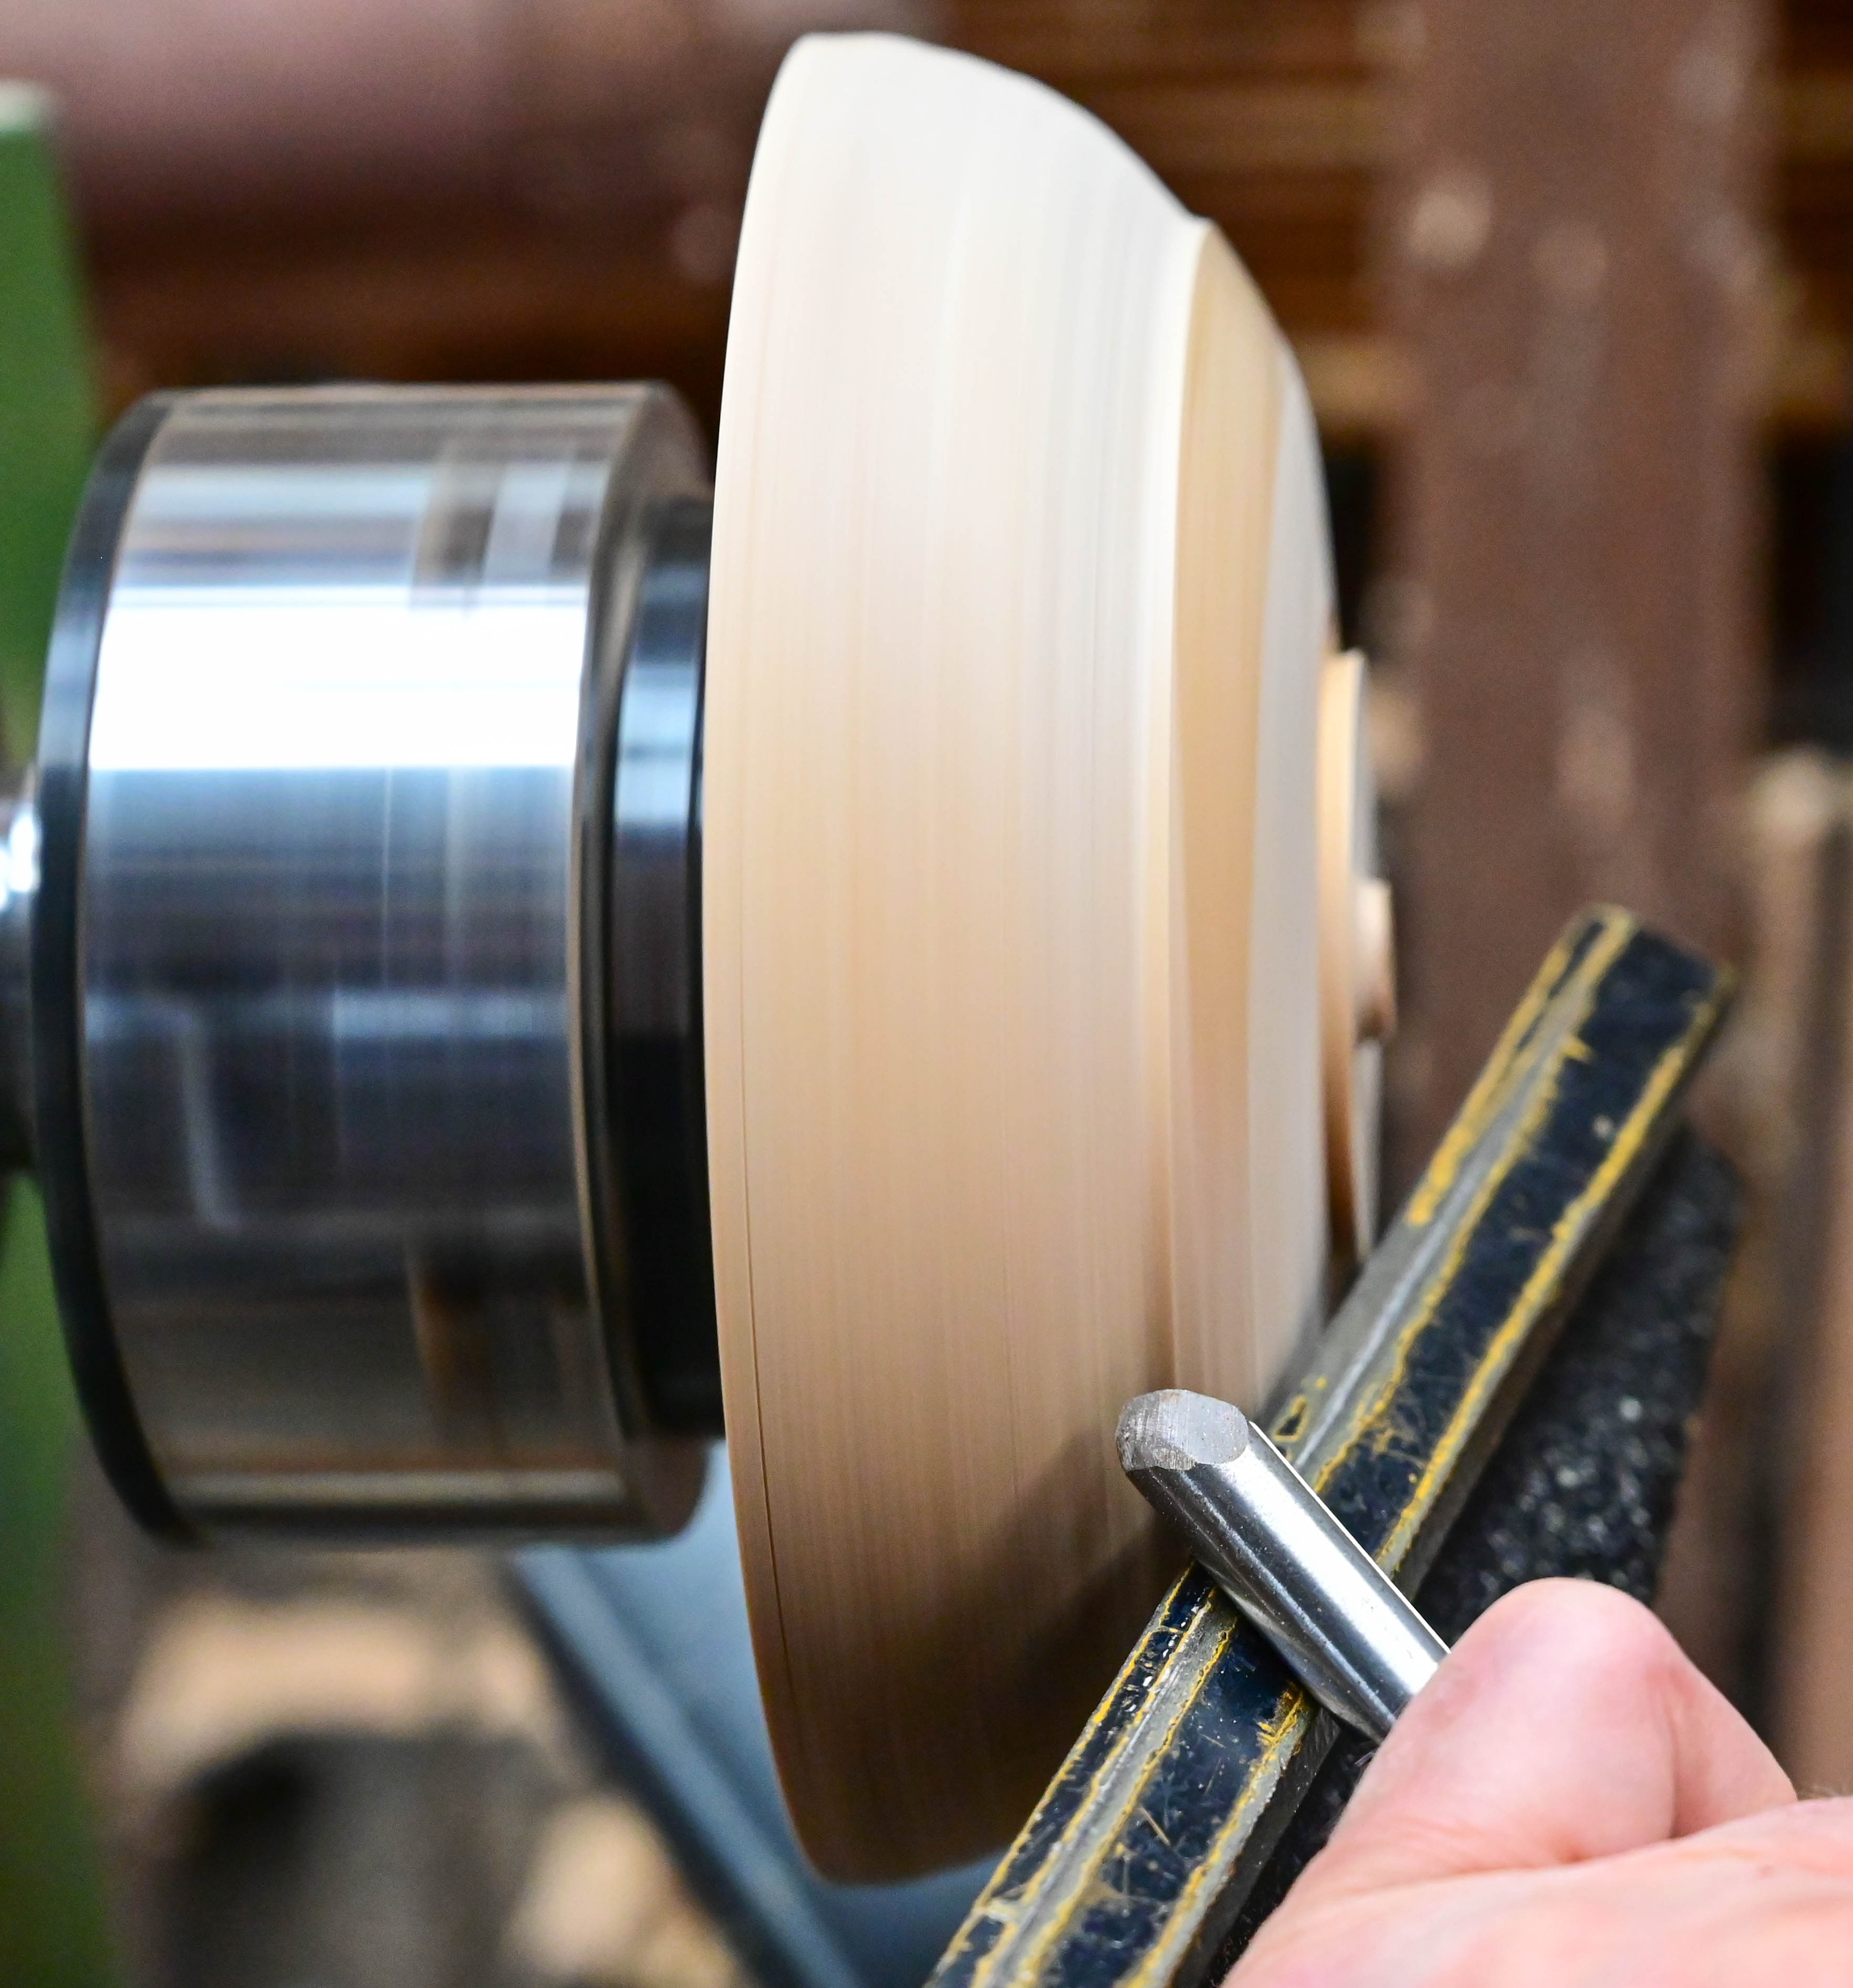
All turners can benefit from modern carbide-tipped tools which can be easier to use and more efficient than traditional gouges. I often use a cupped carbide cutter on a probe or swan neck shaft in place of a gouge as the geometry of the tool enables me to achieve a more comfortable working position while making some cuts. Similarly, because of the way they cut, flat topped carbide tools can be easier to use for some operations on both bowls and hollowing as they require less handle swing movement. Due to their geometry, carbide tools work a little differently than traditional gouges. You may have to adjust your techniques, but once you have adapted to them, they are a good addition to conventional tools.
Ensuring your tools are sharp makes a huge difference in the effort required to make them work. This brings extra benefits when you are near the limit of your reach.
Organizing your workplace pays dividends when turning.
Arranging everything you will need for a turning session and placing items readily at hand, can minimize having to get up and down to find things. This should also include a means of keeping your tools sharp; I use a diamond hone. However, remember that just because you have surrounded yourself with everything you need, and don’t actually need to get up to grab a tool, this shouldn’t dissuade you from taking regular breaks to prevent stiffness, tiredness and to focus your eyes on something different for a few moments.
Taking short breaks is much quicker than making mistakes.
See Photo 5.
Techniques & Tools
Use your equipment to make life easier for yourself, so consider drilling with a forstner bit to remove the center of a blank as it’s easier than taking it out with a gouge. When hollowing endgrain, this method gives the option of turning from the center towards the outside of a blank, which is easier and kinder to the wood as you’re cutting with the grain. You will also get a better finish off the tool.
Respect the wood and your tools, and they will help you.
Select the most effective tools for hollowing that you like to use. This might include a gouge, a scraper, or cupped and flat carbide cutters. This can make your life easier and more productive. Although you have to put one tool down and pick another up, it’s about enjoying how the tools work and getting the shape and finish you desire. Ultimately, that way of working can actually be quicker.
If your lathe has a swivel headstock, rotate it to give easier access to the blank you’re working on. You will often find you can achieve a more comfortable turning position with all the benefits that brings.
See Photo 6.
When turning a platter you need to get into a comfortable position to achieve a flowing cut. That will mean changing your working angle depending on which side of the platter you are working on.
Bowls, especially the larger ones, require you to move the tool, and your arms and body, the most to achieve an uninterrupted cut and create the flowing lines needed, both inside and outside. When standing you may lock your tool handle to your hip and transfer weight and swing your hips to make the cut, but this often this isn’t enough to complete a curve in one go. When seated or perched, this problem is exacerbated as your arms will move further away from your body and the support that provides, compared with a standing turner.
It is possible to maintain full control, however, with three fundamental, but easy to achieve adjustments.
Adjustment 1 – Minimizing unsupported arm extension.
Carefully position your body to turn comfortably with minimal arm extension. Consider running the lathe in reverse when hollowing the inside of a bowl. When using a standard bowl gouge, this results in the tool being held closer to your body overall for the cut you’re undertaking, reducing arm extension and improving control.
Stay Safe: If you turn with the lathe in reverse, ensure you use a chuck that can be locked to your spindle.
Swiveling the lathe headstock can also help achieve a more comfortable turning position for cutting both the inside and outside of a blank as the lathe bed is not in the way.
Adjustment 2 – Using the most appropriate tool(s).
Choose the right type and size of tool for the task in hand and your abilities. Sometimes I will use a spindle gouge to cut the outside bottom of a bowl as the tool geometry allows a better handle position, hence more comfortable arm position. Most of my gouges have sweptback wings, and I have gouges with different grind angles allowing a slightly more comfortable presentation angle. All of my tools are kept sharp, minimizing the effort required to make cuts.
Adjustment 3 – Perfecting technique.
Seated or perched turners benefit greatly from good tooling technique. Where standing turners sometimes just muscle through poor technique by leaning into the cut, this just won’t work for perched/seated turners. The solution’s easy though. Use good technique which minimizes the effort required to make a cut. It also has the benefit of achieving a better finish off the tool, and who actually enjoys sanding?
I often take two bites at the cherry. Interrupting your cut and changing your grip, arms or body position can help minimize arm extension. Then you get to develop a new skill—picking up the cut. Sometimes I use two tools, ground slightly differently to make my stance easier and increase control, say a bowl gouge and a large spindle gouge which is ground more acutely. I also sometimes use the lower wing of a gouge to refine shapes.
Sometimes solving a problem creates a tool buying opportunity.
Ensure your toolrest is close to the work, and don’t take too big a cut, or go too fast. Just concentrate on keeping the cut going forward positively and steer it where you want it to go.
See Photo 7.
Deep hollowing rigs are great. They enable you to undertake what would be adventurous deep hollowing tasks with relative ease and to go deeper than you might otherwise be able to do safely with conventional tools. But, they’re not just for deep vessels; they can also make turning bowls easier, and can even be used on the outside of turnings.
See Photo 8.
The important thing is to achieve the end result you want. No one will know what tool or technique you used to achieve it, but you will have the satisfaction of a good end product.
Reality Check
Consider the projects you want to turn. Just because you’ve always done one type of turning doesn’t mean you have to be restricted to that. There are many avenues to explore and there’s no need to be limited in what you turn. Earlier in my turning journey, it came a surprise to me to discover that many of the hollow forms I admired were actually quite modestly sized.
Once you have embraced some of the options outlined above, you may find that you are able to tackle many more turning tasks than you might initially have thought possible. These techniques enable you to do things you might have previously found difficult, and as you gain confidence in your new abilities, you may find your turning horizons expanded.
See related articles containing complimentary information:
If you can contribute to this bank of knowledge for turners with physical challenges, please get in touch via [email protected], alternatively participate in the "Woodturning Health & Safety" section of the AAW Forum to ask questions and discuss ideas. (You will need to set up an account to access and participate in the AAW Forum, click here.)
You can contact Chris at [email protected] or see his website www.NotJustRound.com.