Turn A Handle
A tool handle is a spindle turning exercise. Locate a suitable piece of hardwood for a handle, 6"- (15cm-) long and about 1-1/4"- (3cm-) square. You will need to drill the end to receive the tool steel; if you have a drill chuck you can accomplish this step on the lathe. If you rely on a drill press, drill a hole for the tool steel before mounting the blank between centers on the lathe.
Tool choices abound for this task, and you can rely on carbide insert tools, a spindle roughing gouge, a spindle gouge, a detail gouge, or a skew chisel for the job.
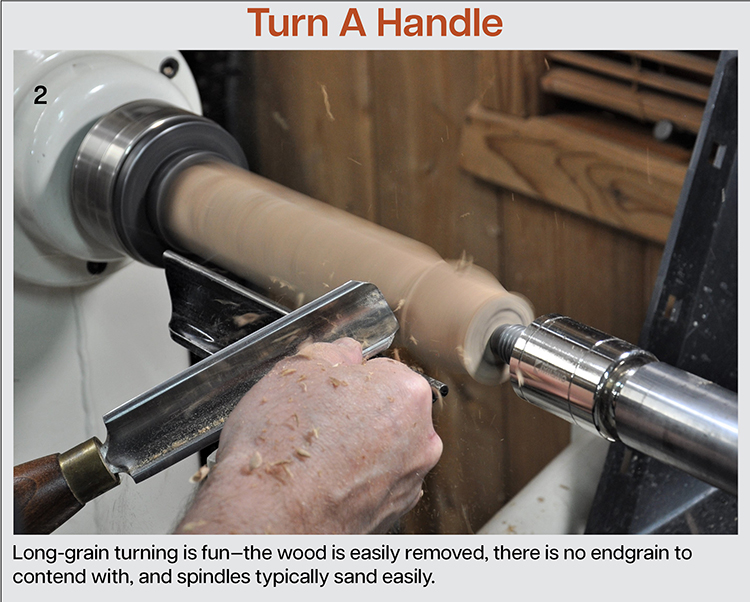
Bring the blank to round (Photo 2). If you drill on the lathe, turn a tenon on the top of your blank and remount the blank in your chuck jaws. Drill the bottom end for your tool steel.
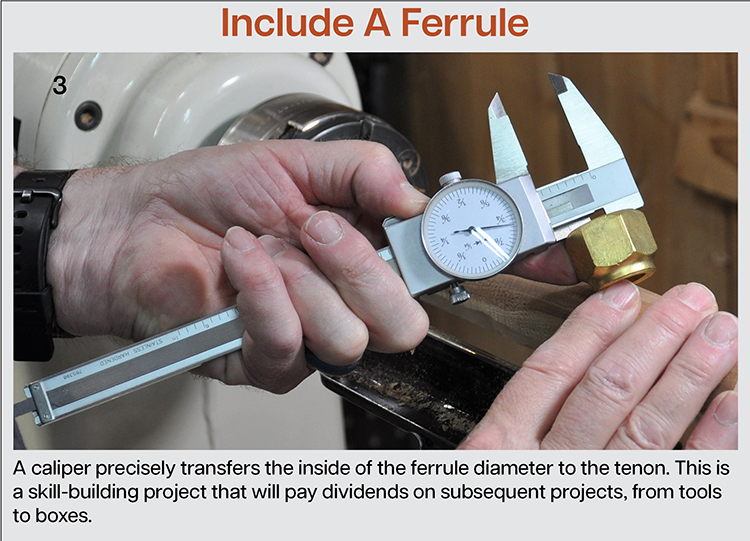
With the tailstock brought up for support, turn a spigot on the tool end to receive a ferrule (Photo 3). Fit the ferrule, then shape the remainder of the handle to fit your hand. Sand your handle to 180- or 220-grit. Apply an oil finish.
More On Ferrules
The ferrule can be made from anything from wound wire to a section of aluminum or copper tubing. A ferrule strengthens the tool handle where the handle accepts the tool steel. Without a ferrule, the long grain can split and cause the tool steel to be pulled from the handle. Because this tool is not used on the lathe, the risk of injury from such a failure is minimal, but you don’t want to break your tool because of an inherent weak point.
For more on ferrules, see Tim Heil’s article “Fancy Ferrules from Everyday Objects,” from the April 2011 edition of American Woodturner.
Editor’s note: The burnisher depicted in the opening image is by AAW member Dan Ernst.
About the Authors:
Tim Heil was introduced to woodturning in junior high school woodshop in 1966. He joined the AAW and the Minnesota Woodturners in 2002, and that put his woodturning skills in high gear. His favorite wood is curly maple.
Mark Palma is a cook, woodworker, and retired tax attorney. He thanks his family for allowing him to have a shop, a tool allowance, wood stash, and the time to pursue his addictive hobby.